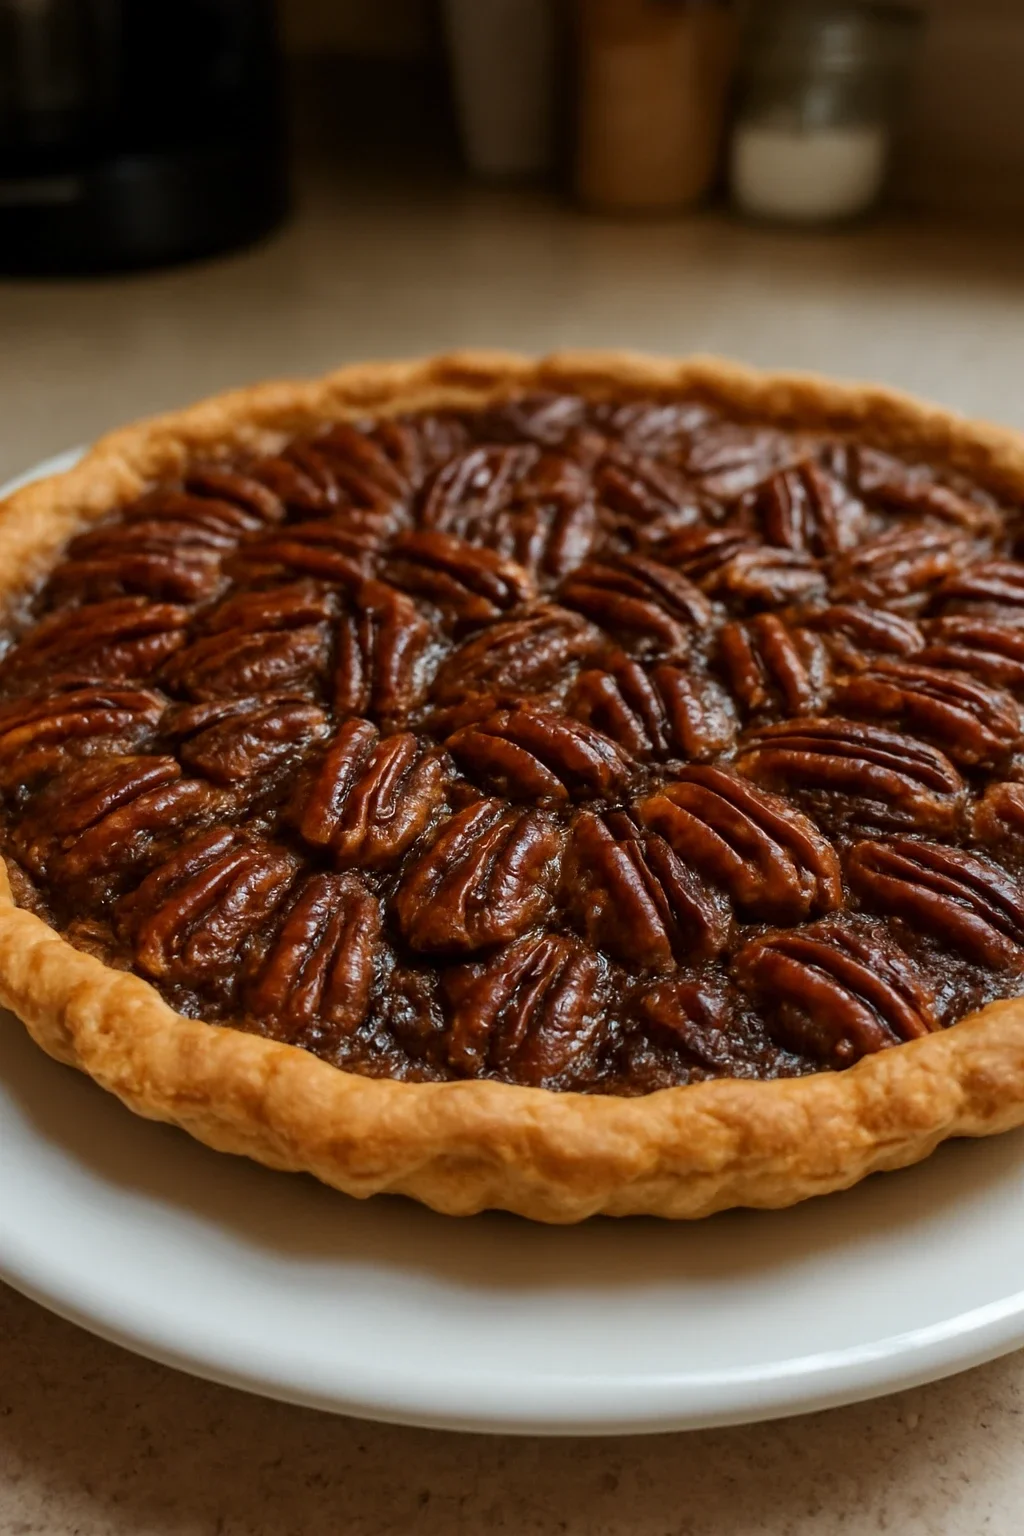
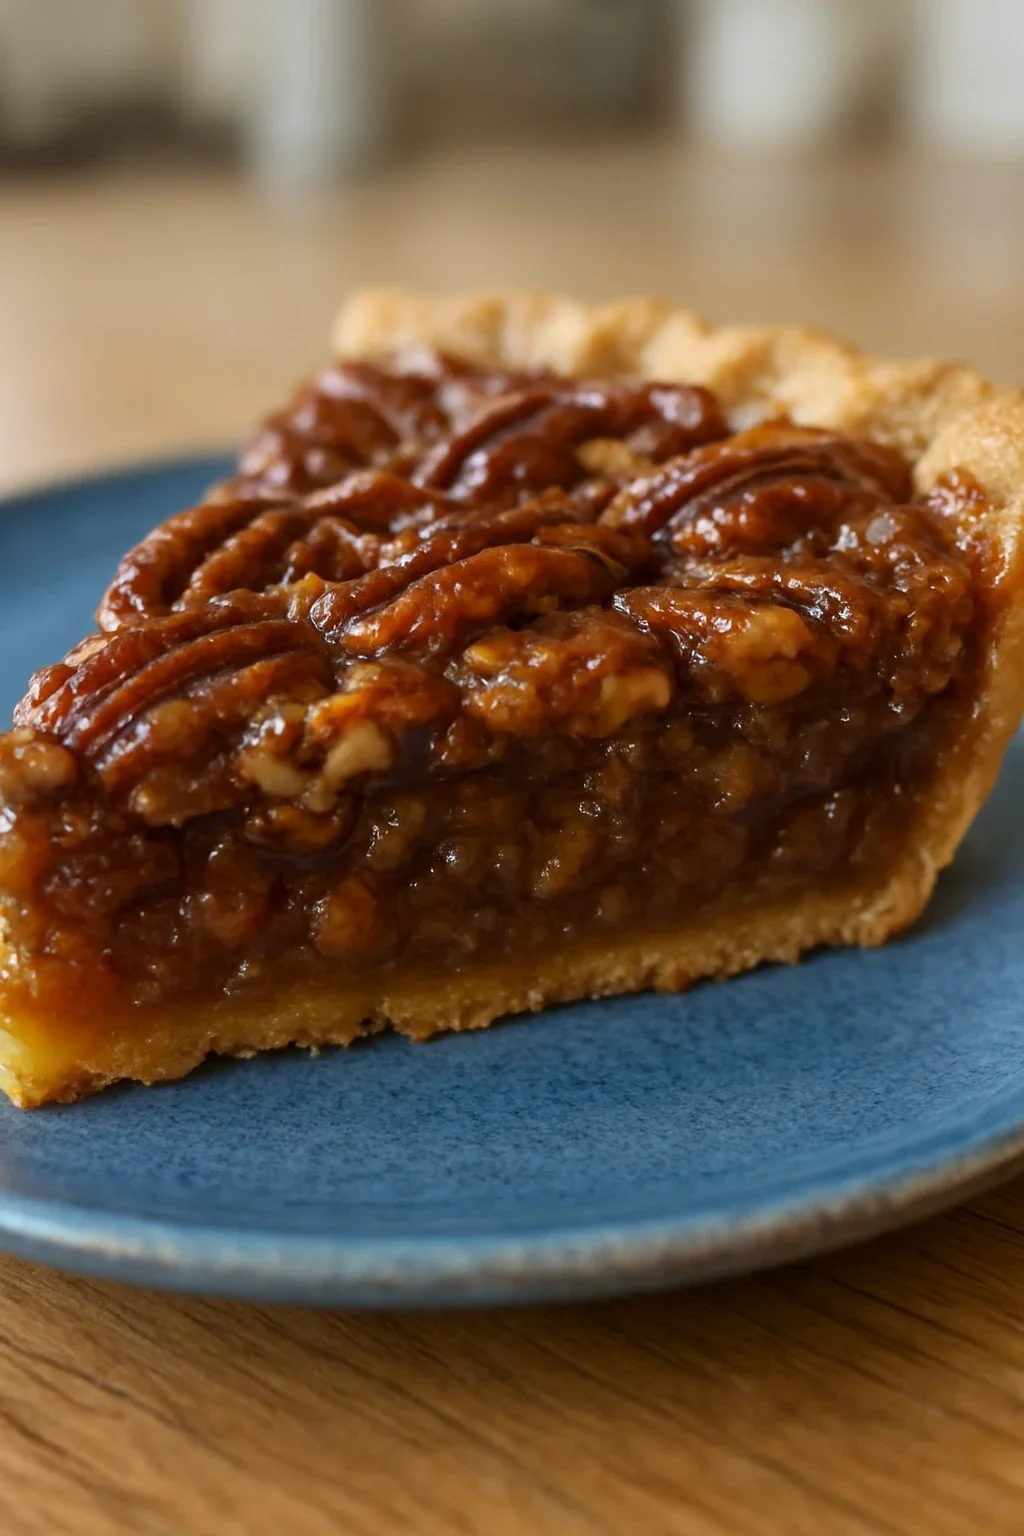
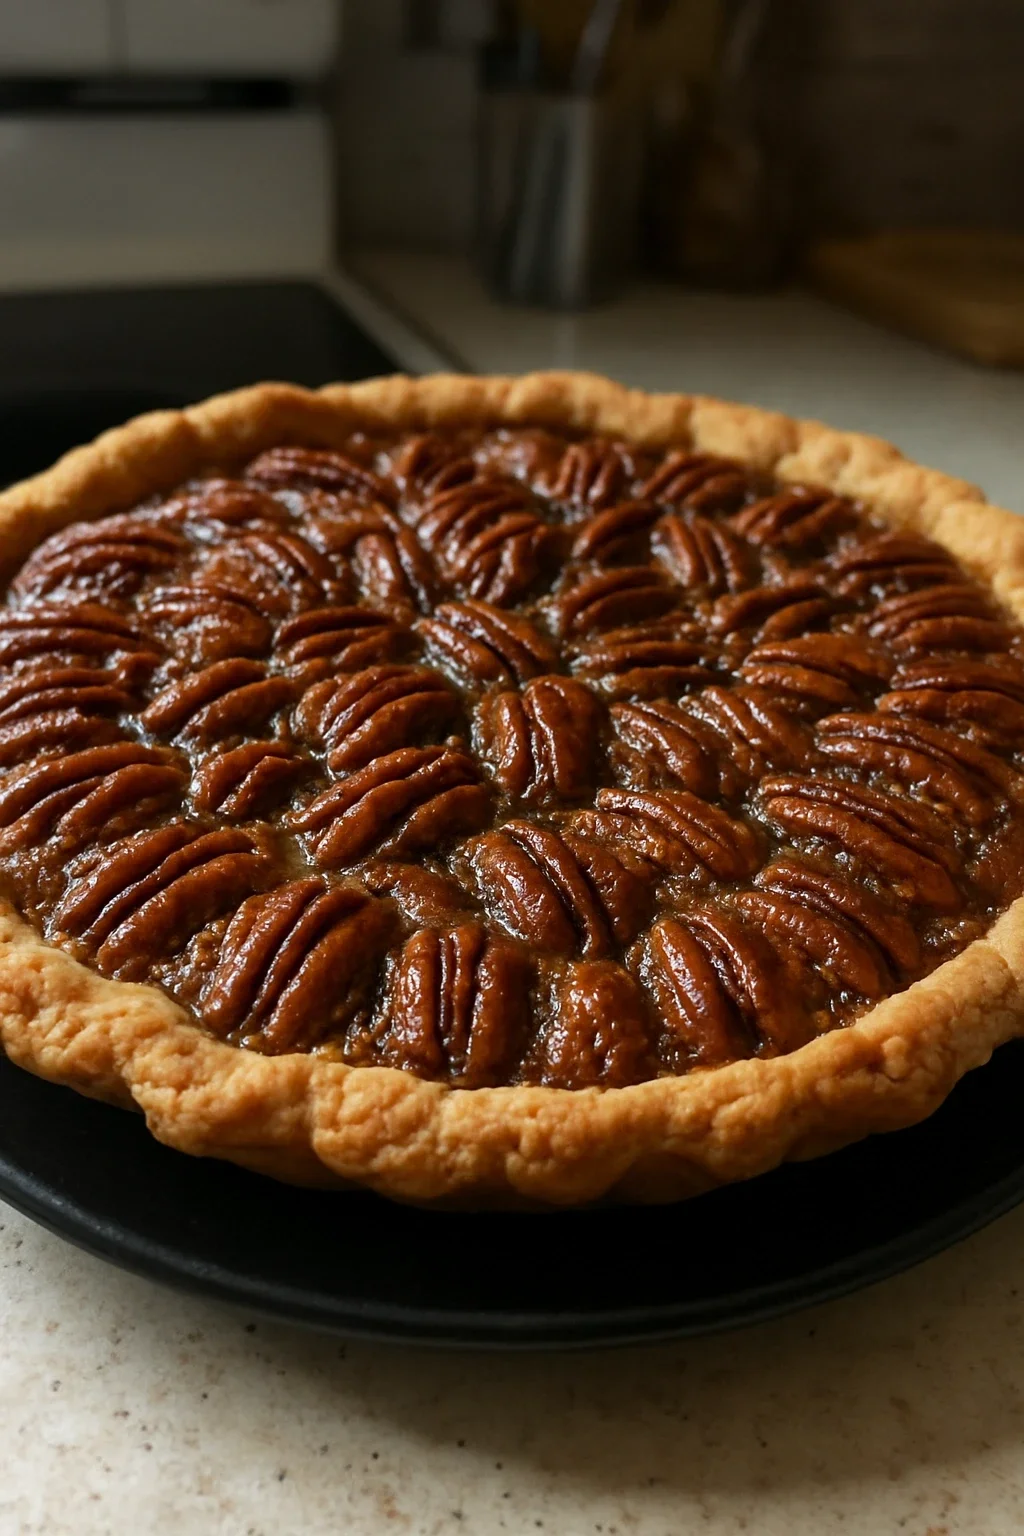
A properly balanced Southern pecan pie with a custard-like filling that sets cleanly without the gummy center or crystallized edges. Learn the correct egg-to-syrup ratio and cooling techniques that create the ideal texture, based on fifteen years of holiday baking.
Introduction
I've been making pecan pie since my grandmother handed me her handwritten recipe card about fifteen years ago, though I've made substantial adjustments since then. The original version had a gummy center that never quite set properly and edges that crystallized after a day or two, becoming unpleasantly grainy. Over years of holiday baking—and honestly, quite a few failures—I discovered that the ratio of eggs to syrup makes all the difference between a pie that sets into a proper custard texture and one that stays vaguely wet in the middle. The version I use now produces that ideal result: a slightly yielding surface that's set enough to slice cleanly, with pecans suspended throughout rather than sunken to a wet bottom layer. This is the pie I make when I need reliable results that impress without requiring constant adjustments or crossed fingers while it bakes.
How To Do It
Step 1
Position the oven rack to the lower-middle position and preheat to 350°F (175°C). The lower-middle position puts the pie closer to the heat source at the bottom, ensuring the crust bakes through instead of staying pale and underbaked. This position keeps the pie away from side heating elements that can overbake the edges before the center sets.
⏱ Time: 10-15 minutes for preheating
✓ Doneness: Oven reaches 350°F, indicated by preheat signal or thermometer
Step 2
Remove the pie crust from packaging and unroll it gently into a 9-inch pie dish. Press it into the dish without stretching. Trim the overhang to about half an inch and crimp the edges decoratively if desired. Using a fork, poke the bottom of the crust in four or five scattered places—not frantically, just a few pricks that create tiny steam vents. This prevents the crust from puffing dramatically during baking without creating channels for filling to seep through.
⏱ Time: 3-5 minutes
✓ Doneness: Crust is evenly fitted with no air pockets, edges are trimmed, bottom has 4-5 small fork pricks visible
Step 3
In a large mixing bowl, use your fingers to break apart any clumps in the brown sugar, pressing them against the bowl. This step is crucial because grainy spots in the baked filling come from undissolved brown sugar. Once the sugar is completely broken down, add the corn syrup, eggs, melted butter, vanilla, and salt to the bowl.
⏱ Time: 2-3 minutes
✓ Doneness: Brown sugar is completely free of lumps, all ingredients are in the bowl
Step 4
Whisk the filling mixture steadily for 1-2 minutes until completely smooth. You're looking for a mixture with no visible brown sugar granules and uniform color throughout. You'll actually hear the difference as you whisk—it changes from a slightly grainy sound to a silky, smooth sound. This aeration also contributes slightly to a lighter, less dense final texture.
⏱ Time: 1-2 minutes
✓ Doneness: Mixture is completely smooth with no visible granules, color is uniform throughout, whisking sounds silky rather than grainy
Step 5
Stir in the pecan halves, distributing them evenly throughout the filling. Stirring them in now, rather than scattering them on the crust bottom, prevents them from forming a single pecan layer at the bottom. Instead, they'll be suspended throughout the filling, creating better texture distribution.
⏱ Time: 1 minute
✓ Doneness: Pecans are scattered throughout the filling, none are clustered in one area
Step 6
Pour the filling into the pie crust slowly and deliberately, distributing the pecans as you pour by occasionally stirring the bowl. Fill to approximately half an inch from the rim—filling to the very top causes it to seep out during baking and over-fill the dish. Before sliding the pie into the oven, make absolutely certain your oven rack is level. Even a slight tilt causes filling to pool on one side and seep underneath the crust.
⏱ Time: 2 minutes
✓ Doneness: Filling reaches approximately half inch below rim, pecans are distributed throughout, crust is not disturbed, rack is visibly level
Step 7
Carefully place the pie on the preheated oven rack at the lower-middle position. Close the oven door gently to avoid jostling the filling. Set a timer for 40 minutes. The pie will bake undisturbed for this initial period, during which the edges and filling will begin to set.
⏱ Time: 40 minutes
✓ Doneness: Pie is safely on the rack, oven door is closed, timer is set for 40 minutes
Step 8
When the timer reaches 40 minutes, perform the jiggle test. Open the oven door carefully and gently shake the pie dish with a side-to-side motion—not violently, just a simple gentle shake. You're evaluating the filling's movement. The outer edges should be completely set with zero jiggle. The center area, approximately 2 inches across, should have a barely perceptible wave, similar to Jello that's almost set but not quite finished. This carryover cooking stage is crucial. The residual heat will set that center perfectly as it cools, transforming it from liquid to proper custard.
⏱ Time: 40 minutes total cooking time
✓ Doneness: Outer edges of filling show no movement when dish is shaken, center 2-inch area has slight wave (not dramatic wobble), crust edges are golden brown
Step 9
If the entire filling jiggles like water, the pie needs more time. If nothing moves at all, you've likely reached the edge of overbaking and edges may develop graininess. If the jiggle test indicates more cooking is needed, bake for an additional 5-10 minutes and retest. The filling's internal temperature should reach approximately 170°F, though most home bakers assess doneness by the jiggle test rather than using a thermometer.
⏱ Time: 5-10 additional minutes if needed
✓ Doneness: If edges are set and center has slight wave, proceed to step 10; if more cooking is needed, retest after 5 minutes
Step 10
Once the pie passes the jiggle test, remove it from the oven using oven mitts. Place it on a wire cooling rack rather than directly on the countertop. The rack allows air to circulate underneath, promoting even cooling. Do not cover the pie. Leave it undisturbed at room temperature for at least 3 to 4 hours before slicing. This cooling time is non-negotiable. The filling transforms from liquid to proper custard as it cools, and slicing into a warm pie releases steam that prevents this critical transformation. I learned this the hard way after slicing into pies after only 2 hours and finding the filling was still too soft.
⏱ Time: 3-4 hours
✓ Doneness: Pie cools at room temperature, surface gradually becomes more opaque, pie reaches room temperature after 3+ hours
Step 11
After 3 to 4 hours of cooling, the pie is ready to slice and serve. For the cleanest cuts, use a long, thin knife dipped in hot water and dried between cuts. This prevents the filling from sticking to the blade and dragging through the pie, which tears the structure and makes slices look messy. A damp cloth helps clean the blade quickly between cuts. The filling should now be firm enough to slice while maintaining its tender, custard-like texture.
⏱ Time: 0 minutes (serving time)
✓ Doneness: Pie is completely cooled to room temperature, filling is firm enough to slice cleanly, slices maintain their shape
Pro Tips
Use beef chuck specifically. Avoid leaner cuts like sirloin or tenderloin.
Beef chuck contains high collagen content that becomes gelatin during cooking, creating the stew's characteristic body and silky mouthfeel. Leaner cuts have minimal connective tissue and become tough when braised because there's no collagen breakdown to keep them tender. Chuck's high fat content also contributes to flavor development.
Toast the pecans separately before adding them to the filling for noticeably deeper flavor.
Raw pecans don't brown much in the oven and taste mild and slightly raw. Toasting them separately for 8-10 minutes at 325°F brings out their natural oils and sweetness. Lay them on a baking sheet, toast until fragrant but not darkened, then cool slightly before stirring into the filling. This step isn't mandatory but creates a noticeably more sophisticated and complex pie that people remember and request again.
Invest in an oven thermometer if you don't already have one.
Most ovens are off by at least 25°F in either direction. If yours runs hot, reduce temperature to 325°F and add 5-10 minutes to baking time. If it runs cool, increase to 375°F. Knowing your oven's actual temperature solves most baking mysteries and prevents underbaking (gummy center) or overbaking (crystallized edges).
Chill the pie crust for at least 15 minutes after fitting it into the dish if using store-bought, or 30 minutes if homemade.
Cold dough has relaxed gluten that won't spring back and shrink up the sides of the dish as dramatically during baking. This prevents that annoying problem where the crust shrinks down the sides, leaving gaps that expose the crust's edge to overbaking.
The jiggle test requires practice and honest assessment.
Start checking at 40 minutes by gently shaking the dish. The outer edges should be completely still. The center should have a slight wave, not a dramatic wobble. If the entire top jiggles like water, it needs more time. If nothing moves at all, you've likely overbaked it and edges will be slightly grainy. This is genuinely the trickiest part to master without experience, so don't hesitate to check it a few times.
Use hot water and a dry cloth to clean your knife between slices for presentation.
Hot water prevents the filling from sticking to the blade and dragging through the pie, which tears the structure and makes slices look messy. Clean the knife quickly between each cut. This simple technique creates professional-looking slices that maintain their shape.
Common Mistakes to Avoid
Slicing into the pie before it has cooled for at least 3 hours, or serving it while still warm.
Why it happens Warm pie smells amazing and looks baked through, making it seem ready to serve. People get impatient and want to enjoy it sooner rather than waiting.
Fix Commit to the full 3-4 hour cooling period at room temperature. The filling continues to set as residual heat dissipates and the eggs continue to coagulate. Slicing warm pie releases steam that prevents this transformation, resulting in a filling that's still soft and won't slice cleanly. If you need to serve sooner, refrigerate it instead, which accelerates setting to about 2 hours cold versus 3+ at room temperature.
Under-whisking the brown sugar, leaving lumps in the filling mixture.
Why it happens Whisking brown sugar until completely smooth takes 1-2 minutes, which feels tedious. People often stop whisking early thinking they've mixed enough, not realizing lumps remain.
Fix Break apart brown sugar lumps with your fingers before whisking, then whisk steadily for 1-2 minutes until the mixture is completely smooth with no visible granules. You'll hear the difference—it changes from grainy to silky sounding. Lumpy brown sugar creates grainy spots scattered throughout the baked filling, which ruins the texture.
Gummy center that never sets, even after waiting the full time.
Why it happens This is usually caused by underbaking or using too few eggs. Some older posts call for 3 eggs, which doesn't provide enough setting power. This recipe uses 4, which is correct for this ratio of syrup to sugar. Or your oven may run cool, preventing the filling from reaching the temperature needed for proteins to coagulate.
Fix Use exactly 4 large eggs for this ingredient ratio. Verify your oven temperature with a thermometer—if it runs cool, increase the temperature to 375°F and add 5-10 minutes. Make sure you're waiting the full 3+ hours for cooling before serving. If it's still very soft after all these corrections, next time bake until the very center shows almost no jiggle, even though it seems overdone at that point.
Crystallized edges or grainy texture in the finished pie.
Why it happens This occurs when the pie overbakes, especially around the edges. The filling's sugar crystals separate from the liquid and create that unpleasant grainy mouthfeel.
Fix Pull the pie out the moment the center reaches the jiggle stage. If the edges are browning too much before the center is done, cover loosely with foil for the last 10-15 minutes of baking. This blocks direct heat while still allowing the center to cook. Also verify your oven temperature with a thermometer—ovens that run hot cause excessive browning. If yours runs consistently hot, reduce temperature to 325°F and add time.
Crust shrinks up the sides of the dish during baking.
Why it happens This occurs when you use warm pie dough or don't chill it adequately before baking. Warm dough has tense gluten that springs back and contracts as it heats.
Fix Always chill the fitted crust for at least 15 minutes (store-bought) to 30 minutes (homemade) before filling. Cold dough has relaxed gluten and won't spring back as dramatically. If using a homemade crust, chill the dough before fitting into the dish as well.
Filling seeps under the crust and creates a wet, soggy bottom.
Why it happens This occurs when you fill too near the rim or pour too forcefully, which disturbs the crust. Or your oven rack is slightly tilted, causing filling to pool on one side and seep out underneath.
Fix Fill to about half an inch from the rim, and pour slowly without jostling. Before putting the pie in the oven, double-check that your oven rack is visibly level. Even a slight tilt causes problems.
Variations
Bourbon Pecan Pie
Replace ½ teaspoon of the vanilla with 1 tablespoon of bourbon whiskey. Add it to the filling just before pouring. The alcohol cooks off during baking, leaving only the vanilla and oak notes that add complexity. This variation is traditional in Kentucky and transforms the pie's flavor profile from purely sweet to subtly sophisticated. Use a bourbon you'd actually drink; cheap bourbon creates an unpleasant taste. This works beautifully when serving to adults after a meal.
Note: Alcohol evaporates at approximately 173°F, which is below your filling's final temperature, so the alcohol completely cooks off while the flavor compounds remain. The bourbon's vanilla and wood notes complement the pecans and custard beautifully.
Maple Pecan Pie
Replace half the corn syrup with pure maple syrup. Use ½ cup corn syrup plus ½ cup pure maple syrup instead of a full cup of corn syrup. You may need to reduce total liquid slightly because maple syrup is thicker than corn syrup. This variation creates a subtly different flavor that works especially well in fall and appeals to people who find traditional pecan pie too aggressively sweet. The maple notes complement the pecans' natural nuttiness.
Note: Maple syrup's thickness requires slight adjustment. If your filling seems too thick before baking, add ¼ teaspoon of water and whisk well. Monitor the jiggle test carefully since the texture may set slightly faster with maple syrup.
Brown Butter Pecan Pie
Instead of regular melted butter, brown the butter first by heating it over medium heat until the milk solids turn golden and fragrant, about 5-7 minutes. Listen for a nutty aroma and watch until the solids at the bottom turn light brown. Let the brown butter cool slightly before whisking into the filling. Use the same 2 tablespoons quantity. The nutty flavor it adds is sophisticated and noticeably deepens the pie's overall complexity.
Note: Brown butter adds a depth of flavor that elevates the pie without changing the texture or baking time. The only difference is the enhanced flavor profile. Be careful not to burn the butter—stop when the solids are golden, not dark brown.
Chocolate-Pecan Pie
Add ½ cup of semi-sweet chocolate chips or roughly chopped good-quality chocolate to the filling just before pouring. The chocolate will melt slightly during baking and distribute throughout, creating a richer, more decadent pie that's genuinely different from the classic version. Use good-quality chocolate; cheap chocolate creates an artificial flavor that overwhelms the delicate balance. This variation appeals to people who want more chocolate flavor integrated into the pie.
Note: The chocolate adds richness but may slightly increase the final denseness. Monitor the jiggle test carefully. The texture should remain custard-like, not cake-like. If the chocolate is finely chopped, it will melt better and distribute more evenly.
Walnut Pecan Pie Variation
Use walnut halves instead of pecans in a 1:1 substitution. Walnuts are slightly more bitter and create a different texture profile than pecans. Toast them as well for maximum flavor development. This creates a more earthy flavor profile that some people prefer to the sweetness of traditional pecan pie. The earthiness complements the custard filling nicely.
Note: Walnuts are slightly denser than pecans and cook at the same rate. Toast them at 325°F for 8-10 minutes until fragrant but not darkened. The flavor is noticeably more complex and less sugary than traditional versions.
Gluten-Free Adaptation
Use any reputable gluten-free pie crust from the freezer section, following the package directions carefully. The filling is naturally gluten-free, so only the crust needs substitution. Most quality gluten-free crusts bake and brown similarly to regular crusts with minimal adjustment. The texture and baking time remain the same as the traditional recipe.
Note: Check that your gluten-free crust brand doesn't have significantly different binding ingredients. Some specialty crusts brown faster or slower depending on their composition. Monitor the crust's browning and adjust oven position if needed.
Nutrition
Per Serving:
approximately 485
Calories
These values are estimates based on standard ingredients and will vary depending on exact brand selections, pecan size, and crust composition. Values are calculated for one slice (1/8 of pie). Nutritional information is approximate and provided for informational purposes only.
Storage & Tips
Room Temperature
A freshly baked, fully cooled pie keeps well at room temperature for about 2 days, covered with a cake dome or loosely with plastic wrap. Don't seal it too tightly or condensation will collect on top and make the crust soggy. Keep it away from direct sunlight and warm spots in your kitchen. The flavor remains most vibrant at room temperature.
Refrigerator
Covered, the pie lasts up to 5 days in the refrigerator. The filling becomes noticeably firmer when cold, which some people actually prefer because it's easier to slice cleanly. The flavor is slightly less pronounced when served cold, so let it come to room temperature for 30 minutes before serving if you want the full flavor experience.
Freezer
Pecan pie freezes beautifully for up to 3 months. Cool it completely, then wrap tightly in plastic wrap and then in foil to prevent freezer burn. Freeze it whole or sliced—both work equally well. Thaw at room temperature for 2-3 hours before serving. The texture remains virtually identical to fresh pie.
Reheating
Place a slice on a plate and microwave for 15-20 seconds to warm it to eating temperature without drying it out. Alternatively, place the whole pie in a 275°F oven for about 15 minutes to warm through gently. Reheating returns the filling to that slightly yielding texture. Avoid overheating, which can cause the filling to separate.
Make Ahead
You can prepare the unbaked pie up to 24 hours in advance. Assemble it completely, cover with plastic wrap, and refrigerate. Bake directly from the refrigerator, adding 5-10 minutes to the baking time since it's starting cold. This is perfect for holiday planning when oven space is tight and you need to coordinate multiple dishes. The cool filling may take slightly longer to reach the jiggle stage.
FAQ
Can I make pecan pie the day before serving it, such as for Thanksgiving?
Yes, absolutely. Bake it fully, cool to room temperature, and cover loosely with plastic wrap. It will keep at room temperature for 2 days or in the refrigerator for up to 5 days. Reheat gently in a 275°F oven for about 15 minutes if you prefer it warm. This is actually my preferred method because it gives you one less thing to manage on the day you're serving a meal.
How do I know when the pie is really done baking?
The edges should be set with no jiggle when you gently shake the dish. The center about 2 inches across should have a barely perceptible wave. This takes about 45-50 minutes at 350°F in most ovens. Start checking at 40 minutes to account for oven variations. The internal temperature should reach around 170°F, though most home bakers rely on the jiggle test rather than using a thermometer.
Why is my pie still soft and loose after cooling for hours?
If you haven't waited at least 3 hours, the filling simply hasn't set yet. The carryover cooking as it cools is essential and cannot be rushed. If it's been 3+ hours at room temperature and still very soft, you likely underbaked it. Next time, bake until the very center shows almost no jiggle, even though it will seem overdone at that point. Your oven may also run cool—verify with a thermometer.
Can I substitute corn syrup with something else?
Partially. Dark corn syrup changes the flavor unpleasantly. Maple syrup works as a substitute (reduce total syrup to ¾ cup maple syrup plus ¼ cup corn syrup for better consistency). Honey isn't ideal because of its distinct flavor and different thickness. Brown rice syrup is too thin. Corn syrup really is the ingredient that creates the proper custard texture and the specific flavor profile.
Should I refrigerate immediately after baking or let it cool at room temperature?
Room temperature cooling produces the best texture and flavor. The filling develops properly as it cools slowly over 3+ hours. If you need to serve sooner, refrigerating it will set the filling faster—usually in 2 hours cold versus 3+ hours at room temperature. Cold pie is actually easier to slice cleanly because the filling is firmer, so both options have advantages depending on your timeline.
How do I prevent the crust from browning too much before the center sets?
If the edges are browning rapidly before the center reaches the jiggle stage, cover loosely with foil for the last 15 minutes of baking. Ensure your oven rack is at the lower-middle position and verify your oven temperature with a thermometer—ovens that run hot cause excessive browning. If your oven runs consistently hot, reduce the temperature to 325°F and add 5-10 minutes to the baking time.
Final Thoughts
Pecan pie occupies a specific place in holiday traditions. It's expected, it's comforting, and it's somehow both simple and impressive when executed properly. This version has become my standard because it produces consistent results regardless of the day or oven, and because the flavor is balanced rather than aggressively sweet. The pecans stay intact and contribute their natural nuttiness. The crust browns evenly. The filling sets to that perfect custard consistency that's just firm enough to slice cleanly but still tender. I've made this pie at sea level and at 6,000 feet, in old ovens and new ones, in kitchens with good air circulation and those without. The recipe adapts without requiring constant adjustments or desperate troubleshooting. That's really what matters when you're making dessert for people you care about—you want something that works reliably so you can focus on enjoying the gathering rather than worrying about whether the pie will turn out.