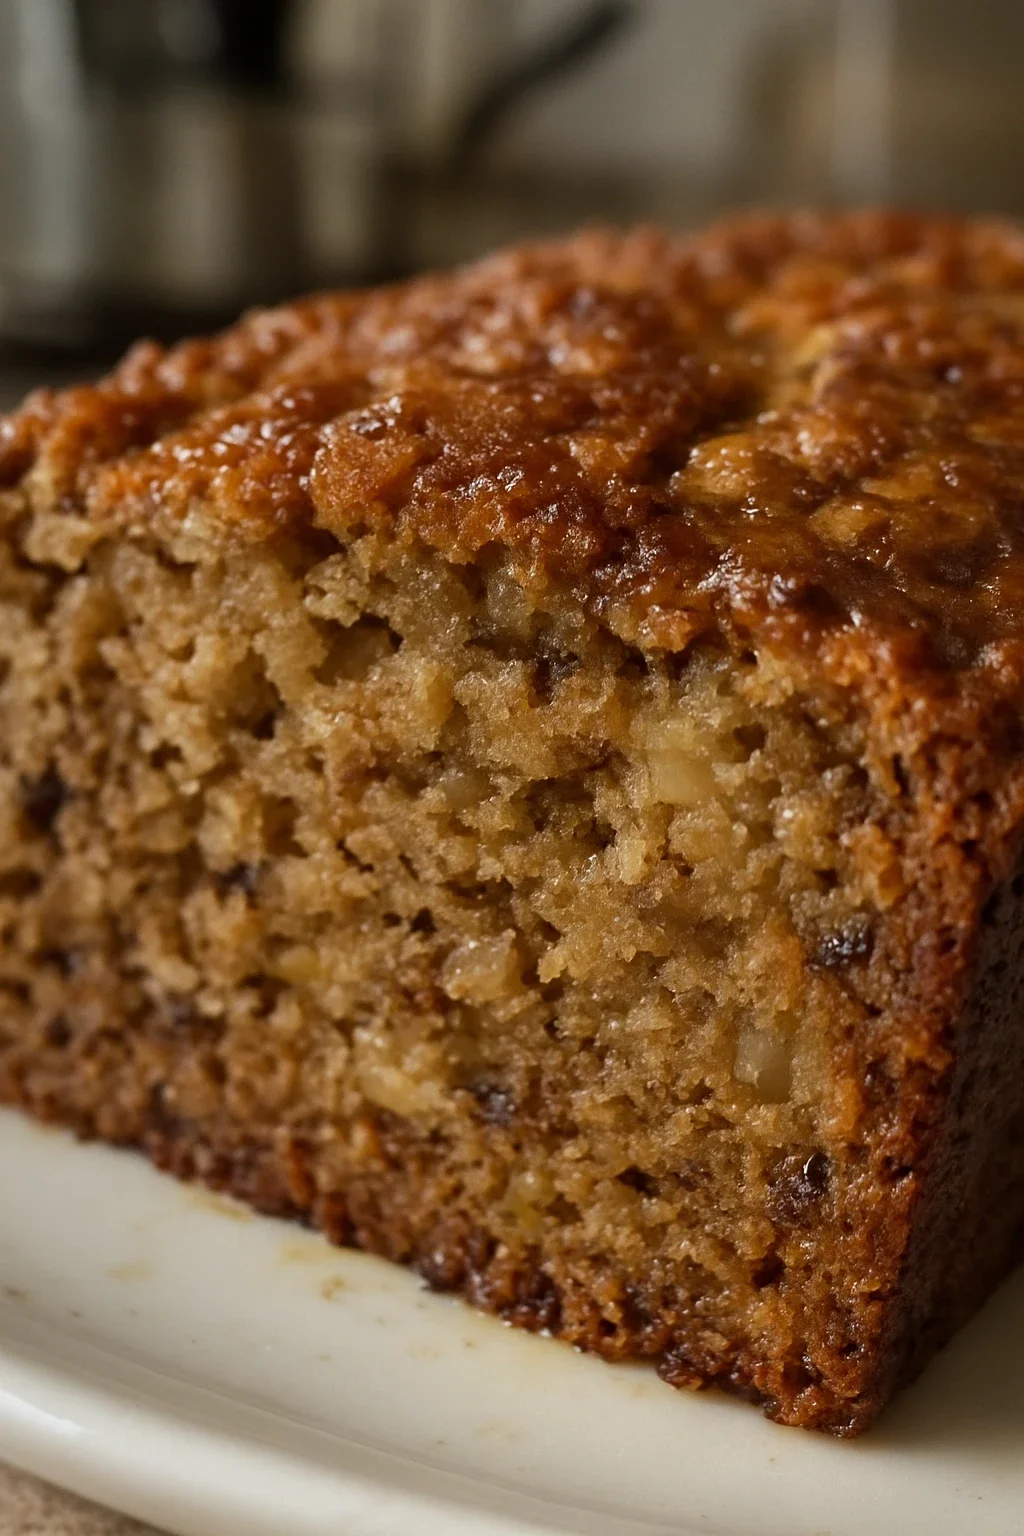
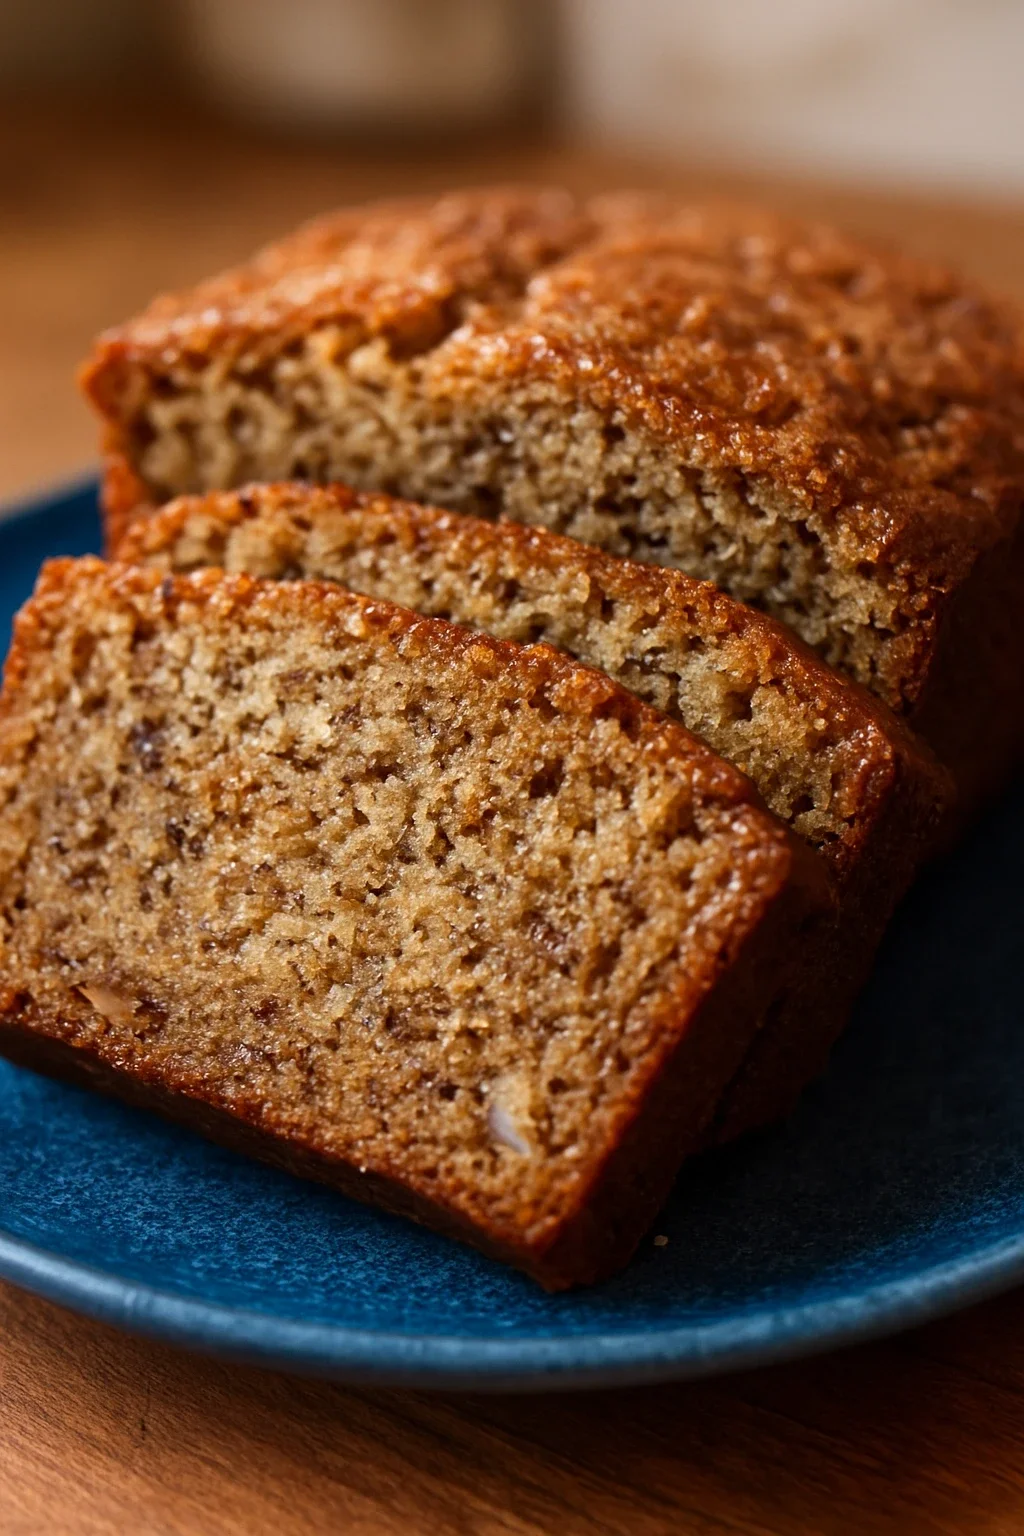
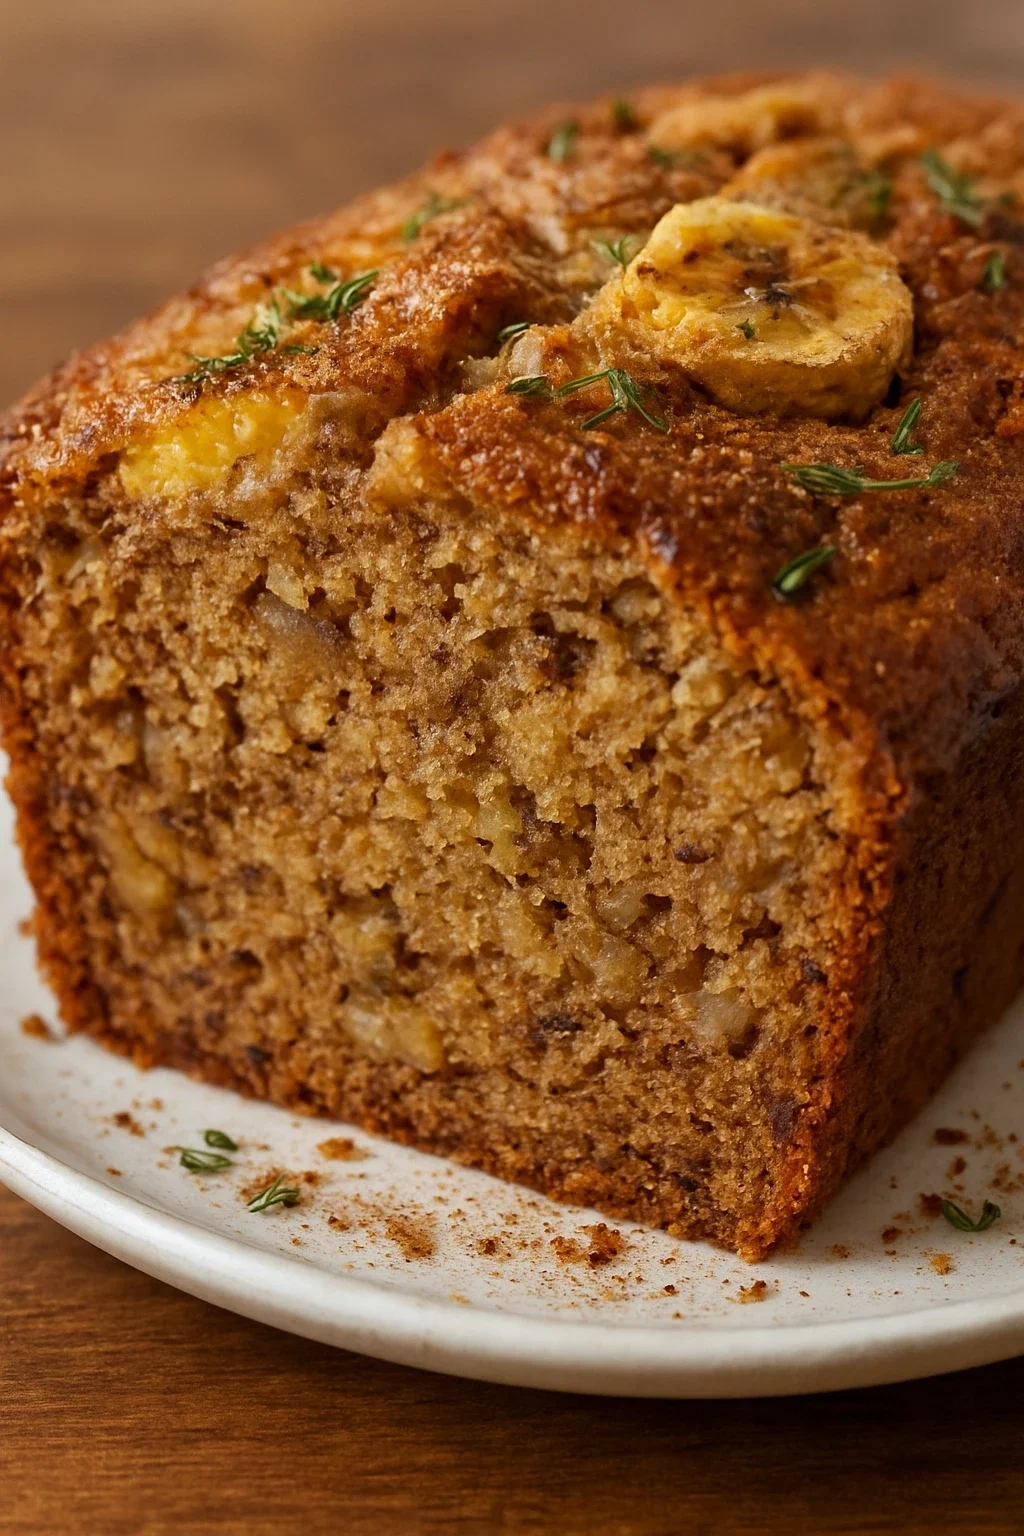
A guide to baking banana bread that achieves the ideal balance between moisture and structure. Learn why banana ripeness fundamentally changes the bread's outcome, how mixing technique directly affects crumb development, and the chemistry behind achieving a tender but structurally sound loaf that stays moist for days.
Introduction
<p>I've been making banana bread for nearly twenty years, and I've learned that this recipe teaches you more about baking fundamentals than its apparent simplicity suggests. The first time I tried to make it, I used bananas that were barely yellow, created something dense that my family politely declined, and threw it away frustrated. Years of testing revealed that every element—the ripeness of the bananas, how thoroughly you mash them, even when you stop mixing the flour—directly determines whether you get a loaf that's moist and tender or one that's dense and gummy.</p><p>Banana bread has become my go-to recipe when I want to teach someone the difference between following instructions and understanding technique. It's forgiving enough that mistakes won't produce inedible results, but precise enough that small adjustments create noticeably different outcomes. I've developed this version through countless baking sessions, testing variables systematically: banana ripeness stages, mixing approaches, different fat sources, oven temperature variations. What emerged is a method that consistently produces loaves with a tender, moist crumb that stays soft for three days and teaches you core baking principles you'll use forever.</p><p>This version works because it respects banana bread's fundamental challenge: bananas contribute significant moisture that must be managed carefully. The ingredients are balanced to absorb this moisture while maintaining tenderness. If you understand the reasoning behind each step, you'll be able to adjust this recipe confidently—scaling it up, adapting it with substitutions, troubleshooting when something doesn't go as planned. The technique matters more than the specific ingredients.</p>
What You'll Need
One 4x8 inch loaf, approximately 8 slices
- 3 large ripe bananas (approximately 1.25 lbs / 570g), peeled and mashed
- 1/3 cup (80ml) unsalted butter, melted
- 1 tsp (5g) baking soda
- 1/4 tsp (1.5g) fine sea salt
- 3/4 cup (150g) packed brown sugar
- 1 large egg (approximately 50g), beaten
- 1 tsp (5ml) pure vanilla extract
- 1.5 cups (190g) all-purpose flour
- Optional: 1/2 cup (90g) chocolate chips or chopped walnuts
How To Do It
Step 1
Preheat your oven to 350°F (175°C) and position a rack to the middle of the oven. Prepare a 4x8 inch (10x20 cm) loaf pan by lightly coating the bottom and sides with butter or non-stick spray. If desired, line the bottom with parchment paper for easy removal. The middle rack position ensures even heat exposure—heat radiates from both above and below, which creates more even browning than if the loaf were positioned higher or lower. If your oven tends to brown items unevenly (many home ovens have hot spots), position the rack slightly lower to prevent the top from browning excessively before the interior cooks through.
⏱ Time: 10 minutes
✓ Doneness: Oven reaches 350°F, steam comes out when door opens, rack is positioned in middle of oven
Step 2
Select bananas that are very ripe, with significant brown spotting across their yellow skin—ideally covering 50-75% of the peel. At this ripeness stage, the banana's starches have been enzymatically converted to simple sugars, which dissolve throughout the batter. These bananas feel softer when squeezed and smell intensely banana-sweet. If your bananas are mostly yellow with minimal spotting, they're not ripe enough and will produce noticeably less sweet bread with a denser texture. Peel the bananas and place them in a mixing bowl. Using a fork, mash them thoroughly, pressing firmly to break down the soft flesh. Aim for mostly smooth consistency with a few small banana pieces remaining—these pieces create pleasant textural variation in the finished bread. You should have approximately 1 cup (240ml) of mashed banana, which is roughly 240g by weight.
⏱ Time: 3-4 minutes
✓ Doneness: Bananas are mostly smooth with a few small pieces visible, mashed banana fills approximately 1 cup measure, color is uniform pale yellow
Step 3
Pour the melted butter into the mashed bananas and stir to combine thoroughly. Use a spoon to mix for approximately 1 minute, pressing the banana mixture against the side of the bowl and stirring from the bottom. The warm butter—currently around 130-140°F (54-60°C) depending on how recently it was melted—slightly warms the bananas without cooking them. This step matters because it helps the egg incorporate more smoothly in the next step. Continue stirring until the butter and bananas are evenly mixed with no visible streaks of separate butter.
⏱ Time: 2 minutes
✓ Doneness: Butter and bananas fully combined, no visible butter streaks, mixture is uniform pale yellow, no lumps of banana remain larger than 1/4 inch
Step 4
Add the baking soda and salt to the banana-butter mixture and stir gently for about 20-30 seconds. You'll notice the mixture will slightly darken in color and develop small bubbles breaking the surface—this is the sodium bicarbonate reacting with the banana's malic and citric acids. The reaction produces carbon dioxide gas (which creates the bubbles you see), water, and sodium salts. This reaction happens immediately and primarily in the bowl before baking, though additional CO2 generation continues when heat is applied in the oven. Continue stirring only until you don't see any dry powder remaining. Overstirring at this stage develops gluten, which you want to minimize.
⏱ Time: 1 minute total
✓ Doneness: Baking soda is fully incorporated with no visible powder, mixture has darkened slightly, small bubbles visible on surface, no dry white specks of baking soda remain
Step 5
Add the brown sugar, beaten egg, and vanilla extract to the banana mixture. Beat the egg first in a separate small bowl with a fork until the white and yolk are completely combined and uniform in color. This pre-beating ensures the egg incorporates smoothly without creating visible streaks. Pour the beaten egg into the banana mixture and stir these ingredients together until just combined, approximately 30-45 seconds of stirring. You should see the egg integrate into the mixture as a uniform liquid, and the brown sugar should dissolve and distribute evenly. The mixture will appear lighter and more cohesive once the egg is fully combined. At this point, assess the batter's consistency visually—it should be thick and pourable, like cake batter rather than soup or dough.
⏱ Time: 2-3 minutes including egg beating
✓ Doneness: Egg is fully incorporated with no visible streaks, brown sugar is dissolved and distributed, mixture is uniform in color and slightly lighter than the banana mixture alone
Step 6
Add the flour in two additions to minimize gluten development. Measure the flour by spooning it into your measuring cup and leveling with a knife—do not scoop directly from the bag, which compacts the flour. First, add three-quarters of the flour (about 1 cup / 125g) and fold it in gently using a rubber spatula or wooden spoon, using 15-20 gentle strokes just until you no longer see dry flour streaks. The batter will look lumpy and rough, which is exactly what you want. Then add the remaining flour and fold gently for another 10-15 strokes until just combined. Stop mixing immediately as soon as you see no visible dry flour—there will still be visible lumps of flour throughout the batter, and this is essential. These small, incompletely hydrated flour lumps form tiny pockets in the final crumb as they absorb moisture during baking. Fully mixing the flour would develop gluten, which would create a denser, tougher crumb structure. This is the single most important technique step in banana bread baking.
⏱ Time: 2-3 minutes
✓ Doneness: No visible dry flour streaks, but small lumps (about pea-sized or smaller) remain throughout batter, batter is thick and chunky, color is uniform
Step 7
If using chocolate chips or chopped walnuts, fold them gently into the batter with just 2-3 additional strokes of the spatula. Do not stir the overall batter further after adding the mix-ins. The goal is to distribute the add-ins throughout without over-working the batter and developing more gluten. Limit add-ins to a maximum of 1/2 cup total by volume. If using chocolate chips, ensure they're completely dry before adding them. If using nuts, toast them in a dry pan over medium heat for 3-4 minutes until fragrant, then cool completely—this drives off surface moisture and concentrates their flavor.
⏱ Time: 1 minute
✓ Doneness: Chocolate chips or nuts are visible throughout batter, distributed evenly without excessive stirring, overall batter consistency remains lumpy
Step 8
Pour the batter into the prepared loaf pan and smooth the top gently with a spatula, pressing lightly to even out the surface without compacting the batter. The surface should be relatively level so the bread bakes evenly and doesn't develop a dramatic peak or dome in the center. Place the pan in the preheated oven on the middle rack. The batter will begin rising immediately as the oven's heat activates the baking soda and generates CO2.
⏱ Time: 2 minutes
✓ Doneness: Batter is in pan with relatively smooth, even top surface, pan is on middle oven rack at 350°F
Step 9
Bake for 50-60 minutes depending on your oven's specific characteristics and the thickness of the loaf. Begin checking for doneness at 50 minutes by inserting a wooden toothpick into the center of the loaf, roughly 1 inch from the edge if possible (the very center often bakes last). The toothpick should come out clean or with just a few moist crumbs clinging to it—not wet batter, which indicates underbaking, but a few crumbs are acceptable. At the same time, observe the bread's color. The top should be deep golden-brown, and the edges should be slightly darker and pulling away from the pan sides. If the top is browning too quickly but the toothpick still comes out wet with batter (indicating the interior isn't cooked through), tent the top loosely with aluminum foil for the remaining baking time. This prevents the exterior from burning while the interior finishes cooking. If you have an instant-read thermometer, the internal center should reach approximately 205-210°F (96-99°C).
⏱ Time: 50-60 minutes
✓ Doneness: Top is deep golden-brown, edges are darker and pulling from pan sides, toothpick inserted in center comes out clean or with a few moist crumbs (not wet batter), internal temperature reaches 205-210°F if using a thermometer
Step 10
Remove the banana bread from the oven and let it cool in the pan for 10-15 minutes. This cooling period is crucial—it allows the crumb structure to set and firm up enough to handle without falling apart. During this resting period, the internal temperature continues to rise slightly from residual heat, and the protein-starch network solidifies. After 10-15 minutes, place a wire cooling rack on top of the pan and carefully invert both together, allowing the bread to slide out onto the rack. The bread should come away from the pan sides easily at this point. If it seems stuck, run a thin knife around the inside edges before inverting.
⏱ Time: 15 minutes
✓ Doneness: Bread has cooled enough that it comes away from pan edges easily, can be inverted without falling apart, is still warm to the touch
Step 11
Allow the banana bread to cool completely on the wire rack, approximately 1-2 hours, before slicing. During cooling, the interior continues to set and firm up as moisture redistributes and the starches fully gelatinize. The bread will be warm after 30 minutes but still too soft to slice cleanly—slicing warm bread causes the crumb to compress and creates a denser texture in the slice than the bread actually has. If you must eat it sooner, allow at least 30 minutes before slicing, but the final texture will be noticeably better if you wait the full 1-2 hours. Once completely cool, the bread will slice cleanly, and the crumb should be visibly tender with fine, even texture.
⏱ Time: 60-120 minutes
✓ Doneness: Bread is cool to the touch, internal temperature has dropped to room temperature, slices cleanly with a serrated knife without crushing the crumb
Pro Tips
Choose bananas with significant brown spotting where brown color covers approximately 50-75% of the skin, not bananas with just a few brown flecks or entirely brown bananas.
Banana ripeness directly determines the bread's sweetness and texture. The enzyme amylase breaks down starch into simple sugars as bananas ripen. Once brown spotting appears, starch has been substantially converted to glucose and fructose. These simple sugars dissolve throughout the batter, creating sweetness and moisture. Bananas that are still mostly yellow contain 20-30% starch, which doesn't dissolve and creates a denser final product. Completely brown bananas become mushy and may contribute excessive moisture. I've tested the same recipe with different ripeness stages, and the difference is dramatic—less-ripe bananas produce bread that tastes noticeably less sweet and has a tighter, denser crumb.
Mash bananas thoroughly but not to a completely smooth puree—leave a few small pieces visible in the mashed banana mixture.
Completely pureed bananas distribute moisture too uniformly throughout the batter, which can create a dense, gummy crumb. When I puree bananas in a food processor, the finished bread is noticeably denser than when I mash them by fork, leaving small pieces intact. Those pieces remain slightly distinct and create textural variation in the finished bread while still contributing moisture. There's also a practical reason: lumpy banana pieces prevent the banana from seeming over-processed, which helps the finished bread taste more handmade.
Use unsalted butter or a neutral oil like vegetable or canola oil. Avoid brown butter or heavily flavored oils, which compete with delicate banana flavor.
Banana bread's appeal depends on subtle banana flavor balanced with sweetness. Brown butter contributes nutty, roasted notes that are delicious in some applications but overpower banana's delicate aroma in this recipe. I made a batch with brown butter to test, and the banana flavor became a background note rather than the primary flavor. Neutral fats—unsalted butter, vegetable oil, or canola oil—don't compete with banana flavor and allow it to shine.
Fold the flour in gently and stop mixing immediately as soon as you no longer see dry flour. Do not continue mixing until the batter is completely smooth—lumps of flour are essential.
Gluten develops through hydration and mechanical action. Each time you stir, you're mixing water (from the eggs and bananas) with flour proteins (glutenin and gliadin), causing them to unfold and form gluten networks. In bread, you want gluten development for structure. In quick breads, you want minimal gluten because you need tenderness, not strength. Those small flour lumps that remain actually create air pockets during baking as they finally absorb moisture and expand. This creates a lighter crumb than fully mixed batter produces. When I over-mix the flour (trying to be thorough), the bread is noticeably denser and tougher.
Invest in an oven thermometer if your oven tends to bake unevenly or if you've noticed browning differences between the top and bottom of baked goods.
Many home ovens run 25°F hotter or cooler than the dial indicates, which dramatically affects banana bread results. If your oven runs hot, the exterior browns before the interior cooks through, and you end up tenting the top with foil for half the baking time. If it runs cool, the bread bakes slowly and may be underbaked at the normal time. An oven thermometer (they cost about $5) reveals the true temperature, allowing you to adjust the dial accordingly. Once you know your oven's actual temperature, all future baking becomes more predictable.
For maximum moisture in the finished bread, wrap the cooled loaf in plastic wrap immediately once it reaches room temperature, and store at room temperature rather than in the refrigerator.
Wrapping traps steam and moisture in the bread, preventing it from drying out. Banana bread left uncovered in open air dries noticeably faster. Room temperature storage (rather than refrigeration) keeps the crumb softer because refrigerator temperatures seem to break down the tender structure of quick breads—I've noticed refrigerated banana bread becomes firmer and less tender than room-temperature stored banana bread, even on the first day. Wrapped banana bread at room temperature stays moist and soft for three days; by day four it begins to noticeably dry.
Common Mistakes to Avoid
Using bananas that are not ripe enough—bananas that are still mostly yellow with only a few brown flecks or spots
Why it happens People often use bananas at the stage where they seem perfectly ready to eat fresh, not realizing that baking requires even riper bananas than eating fresh. There's also the instinct that brown spots mean the banana is getting too old, so people bake with less-ripe bananas to avoid waste. Using less-ripe bananas feels like it should produce acceptable bread, but it actually produces noticeably less sweet, denser bread that tastes less developed.
Fix
Why it happens
Fix Wait until bananas have significant brown spotting (covering 50-75% of the skin) before baking. If you've already purchased bananas that aren't ripe enough, place them in a paper bag at room temperature for 1-2 days to accelerate ripening, or place them in a warm kitchen location to speed the process. In warm climates, bananas ripen within 24 hours. In cooler climates, they may need 48 hours. Check daily by looking at the skin color—once brown spotting appears extensively, they're ready.
Overmixing the batter after adding flour, trying to ensure ingredients are fully and thoroughly combined
Why it happens The instruction to stop mixing while lumps remain seems counterintuitive. Bakers often worry that incomplete mixing will result in flour streaks in the bread, and they continue stirring to ensure everything is fully combined. Extra mixing feels like it should only improve the result, not harm it. This is a fundamental misunderstanding of gluten development's role in quick breads.
Fix
Why it happens
Fix Set a timer for 30 seconds after adding flour and commit to stopping when the timer goes off. Check for dry flour streaks only. If you see dry flour, fold gently a few more times, but set a second timer for 15 seconds and stop immediately when it goes off. The small lumps are not a mistake or incomplete mixing—they're essential to achieving proper crumb structure. I've timed my own mixing to verify: 45 seconds of gentle folding produces a lighter, more tender loaf than 2 minutes of careful mixing, even when both end with similar-appearing batters.
Slicing the bread while still warm from the oven, or while still somewhat warm
Why it happens The aroma of freshly baked banana bread is compelling and makes people want to slice and eat it immediately. Warm bread seems like it should be fine to slice—if anything, it should be easier to cut than cold bread. The texture seems soft and cuttable, so people proceed without thinking.
Fix
Why it happens
Fix Let the bread cool completely on a wire rack for at least 1-2 hours before slicing. The crumb structure sets as it cools. If you can't wait, allow at least 30 minutes of cooling, but the final texture will be noticeably less ideal. I've sliced the same recipe at different cooling stages and can clearly feel the difference in texture—warm sliced bread has a compressed, dense feel in the mouth; fully cooled bread has a lighter, more tender feel. The difference is dramatic enough that I now set a kitchen timer to remind myself when the bread is ready to slice.
Adding too many mix-ins (chocolate chips, nuts, etc.) or using wet mix-ins like fresh blueberries or chocolate chunks without considering their moisture content
Why it happens People want to make the bread more interesting or add favorite flavors, and more add-ins seem better. Chocolate chunks and fresh fruit seem like natural additions to banana bread. The impact of the added moisture seems minor.
Fix
Why it happens
Fix Limit add-ins to a maximum of 1/2 cup total by volume. If using fresh fruit, reduce the amount of mashed banana by the weight of the fruit—if you add 100g of blueberries, reduce mashed banana from 240g to 140g to maintain proper moisture balance. If using chocolate, ensure it's completely dry (chocolate chips should be stored in airtight containers and never exposed to steam from cooking). For nuts, toast them first to drive off surface moisture. I tested a batch with 3/4 cup of chocolate chips without adjusting other ingredients, and the resulting bread was noticeably gummier than the standard version.
Opening the oven door repeatedly during baking to check on progress or to verify that rising is happening
Why it happens The leavening process is invisible, and people want to monitor whether the bread is rising properly. Each time the door opens, heat escapes from the oven, and there's worry that this will harm the final result or that the bread might not be rising enough.
Fix
Why it happens
Fix Resist the urge to open the oven until at least 45 minutes have passed. The leavening process needs stable, continuous heat. Every time you open the oven door, the temperature drops 15-25°F (8-14°C) depending on how long the door is open. The bread is still rising even though you can't see it. If you're genuinely concerned the bread is over-browning on top, you can tent it loosely with aluminum foil, but do this without opening the door—slide the foil-lined rack in at around 35-40 minutes if you suspect over-browning. The tendency to open the door is primarily rooted in anxiety, not actual need to check on the bread.
Variations
Chocolate Chip Banana Bread
Add 3/4 cup (135g) semi-sweet or dark chocolate chips and fold them gently into the batter in the final step. The chocolate adds richness and complexity without fundamentally altering the bread's structure. For more intense chocolate flavor, you can also add 1 tablespoon (5g) of unsweetened cocoa powder to the dry flour mixture before adding to the wet ingredients, folding it in gently with the flour.
Note: Chocolate chips contain cocoa butter, which is fat. Adding too much fat can make the bread overly rich or dense. Staying at or below 3/4 cup of chips ensures the bread maintains its intended texture. If using cocoa powder, sift it together with the flour before folding in to prevent cocoa powder clumps from forming in the batter.
Walnut or Pecan Banana Bread
Toast 3/4 cup (85g) of chopped walnuts or pecans in a dry pan at medium heat for 3-4 minutes until fragrant and slightly darker, then allow them to cool completely before folding into the batter in the final step. Toasting develops the nuts' flavors and ensures they're completely dry before adding to the batter.
Note: Always toast nuts before adding them to quick breads. Raw nuts absorb moisture from the batter and can create dense pockets in the bread. Toasting drives off surface moisture, darkens the nuts slightly, and intensifies their flavor compounds so a smaller amount creates more noticeable impact on the final flavor. Avoid over-toasting (when nuts begin turning black) as this creates bitter flavors.
Whole Wheat Banana Bread
Replace half of the all-purpose flour with whole wheat flour (3/4 cup / 95g all-purpose flour and 3/4 cup / 90g whole wheat flour). Whole wheat flour's bran particles absorb liquid differently than refined flour, so add an additional 2 tablespoons (30ml) of milk or non-dairy milk (cow's milk, almond milk, oat milk) to the batter to maintain proper consistency.
Note: Whole wheat flour contains bran and germ, which absorb water more readily than the endosperm (which is all that refined flour contains). The denser crumb from whole wheat is still tender but noticeably more substantial than all-purpose flour alone produces. Sift the whole wheat flour with the all-purpose flour before folding in to prevent whole wheat particles from settling in clumps at the bottom of the batter.
Low-Sugar Banana Bread
Replace the brown sugar with a combination of unsweetened applesauce and a natural sweetener: use 1/2 cup (120g) unsweetened applesauce plus 2 tablespoons (25g) honey or pure maple syrup. Reduce the melted butter by 1 tablespoon (15ml) to account for the applesauce's moisture content. Follow the remaining recipe as written.
Note: Applesauce reduces the refined sugar content significantly but adds moisture (applesauce is roughly 85% water). This variation requires reducing other liquid sources to maintain proper batter consistency. The bread will have slightly different texture—slightly denser but still moist and tender. The final bread will be noticeably less sweet than the original, which may appeal to people avoiding sugar. Some tasters find the apple flavor slightly noticeable, which is a trade-off.
Vegan Banana Bread
Replace the egg with a flax egg (combine 1 tablespoon / 7g ground flaxseed with 2.5 tablespoons / 37ml water and allow to sit for 5 minutes to thicken before using). Use vegan butter or refined coconut oil instead of dairy butter. Replace the vanilla extract with vegan vanilla extract if desired (though most vanilla extract is already vegan). Proceed with the recipe as written.
Note: Flax eggs create a slightly denser crumb than regular eggs because flax eggs don't leaven quite as effectively. The ground flaxseed absorbs water and creates a gel-like consistency that functions as a binder, but it doesn't have the leavening properties that egg proteins provide. However, this variation works well in banana bread because the banana's natural moisture and the baking soda's leavening compensate. The bread will be slightly more compact in texture but still moist and edible.
Nutrition
Per Serving:
approximately 240
Calories
These values are estimates based on standard USDA nutritional databases and may vary based on specific ingredient brands, exact banana ripeness (which affects water content and thus density), and exact measurements. Values assume unsalted butter and do not include optional chocolate chips or nuts. If adding 1/2 cup chocolate chips, total calories per slice increase to approximately 310. If adding 1/2 cup walnuts, total calories per slice increase to approximately 320. The addition of these optional ingredients also increases fat content.
Storage & Tips
Room Temperature
Store the cooled banana bread wrapped tightly in plastic wrap at room temperature for up to 3 days. The plastic wrap prevents moisture loss by trapping steam around the loaf. At room temperature, the bread maintains a soft, moist crumb. After 3 days, the bread begins to noticeably dry out even when wrapped. I've tested storing banana bread wrapped at room temperature for 4-5 days, and while it's still edible, the texture becomes noticeably firmer and less tender.
Refrigerator
Banana bread can be stored in an airtight container in the refrigerator for up to 5 days, but refrigerator storage does change the texture. Cold temperatures seem to accelerate the breakdown of the tender structure of quick breads, making refrigerated banana bread noticeably firmer and more compact than room-temperature stored bread, even on day one. The moisture content remains roughly the same, but the crumb feels different when eating. This is why I recommend room temperature storage unless you need the bread to last longer than 3 days.
Freezer
Freeze banana bread for up to 3 months. Slice the cooled loaf into individual portions and wrap each slice tightly in plastic wrap, then place all wrapped slices in a freezer bag. Label the bag with the date. This approach allows you to thaw individual slices as needed without thawing the entire loaf. Alternatively, wrap the entire cooled loaf tightly in plastic wrap, then in aluminum foil, and freeze whole. Frozen banana bread thaws at room temperature in about 1-2 hours depending on thickness. The texture remains reasonable after freezing—slightly less tender than freshly baked but still moist and pleasant.
Reheating
To warm individual slices, place them in a 300°F (149°C) oven for about 5 minutes, or microwave on 50% power for 20-30 seconds. Reheating restores some of the softness that may have developed during storage. Do not microwave on full power, which creates hot spots and makes the bread tough. I've tested both methods, and the oven method produces more even warming, but the microwave is faster for a single slice.
Make Ahead
The batter can be prepared up to 8 hours ahead of baking and refrigerated in an airtight container. Cold batter will take approximately 5 additional minutes to bake (so total time becomes 55-65 minutes instead of 50-60 minutes), so begin checking for doneness at 55 minutes. The flavor actually improves as ingredients meld during refrigeration, making this a practical make-ahead option for busy schedules. This is useful when you want fresh banana bread for breakfast but don't want to prepare it early in the morning.
FAQ
Why is my banana bread dense and gummy in the center even though the toothpick came out clean?
This indicates the bread was underbaked, or your oven temperature runs cooler than 350°F. Banana bread's high moisture content requires the internal temperature to fully reach 205-210°F for starches to fully gelatinize and set the crumb structure. If the toothpick came out clean but the bread feels gummy, the exterior reached the right temperature while the interior didn't. Use an instant-read thermometer to verify internal temperature. Also check that you're using ripe bananas and not overmixing the flour, as these also contribute to density. If your oven temperature is correct, increase baking time by 5-10 minutes.
My banana bread is very dry and crumbly. What caused this, and can I prevent it next time?
Dryness indicates overbaking. Banana bread dries quickly once it passes the optimal doneness point. Start checking for doneness at 50 minutes rather than waiting until 60. Also verify that your bananas were ripe enough—less-ripe bananas contribute less moisture. Finally, ensure you're not adding too much flour. If your bananas were particularly wet (which varies seasonally and based on banana growing conditions), you may have compensated by adding extra flour, which absorbed too much moisture. Use a scale to measure flour precisely if possible.
Can I use all white granulated sugar instead of brown sugar?
Technically yes, but the result will be noticeably different. Brown sugar contains molasses at roughly 3.5% by weight, which contributes moisture and creates a finer, more tender crumb. Using white sugar produces slightly drier, less tender banana bread. If you must use white sugar, reduce the flour by 1 tablespoon (8g) to compensate for the missing moisture the molasses provides. However, I recommend sourcing brown sugar because the difference in texture is noticeable enough to be worth the effort.
What should I do if my bananas are too yellow and not ripe enough?
Place them in a paper bag at room temperature and check daily. They'll ripen in 1-2 days depending on how warm your kitchen is. You can accelerate ripening by placing the bag in a warm location (near a sunny window is ideal, though direct sunlight can create bruised spots). Once brown spotting appears across 50-75% of the peel, they're ready for banana bread. In cold climates, this process may take 3-4 days. In warm climates, it may happen within 24 hours.
Why do the instructions recommend stopping mixing the flour while small lumps remain instead of mixing completely until smooth?
Gluten develops when flour proteins are hydrated and mixed. In quick breads like banana bread, minimal gluten development produces a tender crumb, while excessive gluten development creates a tough, dense bread. Those small flour lumps that remain actually create air pockets during baking as they finally absorb moisture and expand. This produces a lighter, more tender crumb than fully mixed batter. The instruction seems counterintuitive, but it's based on how gluten actually affects texture in quick breads.
How can I tell if my banana bread is done without a toothpick?
The top should be deep golden-brown, and the edges should be slightly darker and pulling away from the pan sides. When you gently press the top with your finger, it should spring back slowly but eventually. If your finger creates a permanent dent that doesn't spring back at all, the bread needs more time. An instant-read thermometer is the most accurate method—the internal center should reach 205-210°F (96-99°C). If you don't have a thermometer or toothpick, the visual and touch tests are reasonably reliable indicators.
Final Thoughts
<p>Banana bread teaches fundamental baking lessons that extend far beyond this single recipe. Understanding why banana ripeness matters teaches you about enzyme action and starch conversion. Understanding why minimal mixing produces tender crumb teaches you about gluten development's role in different baked goods. Understanding the balance between moisture from bananas, moisture from the egg, and moisture absorption by flour teaches you about ingredient interactions.</p><p>I return to this recipe repeatedly over the years because it never stops teaching me something new. Early batches taught me about oven temperature variation. Later batches taught me about how subtle timing adjustments affect final texture. Recent batches have taught me about how ingredient sourcing (bananas from different suppliers, different flour brands, different egg sizes) affects consistency. Each variable reveals something about how baking actually works.</p><p>The technique remains constant even as you adjust ingredients. Use different ripeness stages of bananas and the method still works—you just adjust flour slightly. Add different mix-ins and the method still works—you limit quantities appropriately. Make the recipe in a different oven and the method still works—you adjust timing. The fundamentals of browning, moisture management, structure building through protein and starch, and controlled heat application remain the foundation. Once you've truly understood these fundamentals through making banana bread repeatedly, you can apply them confidently to any baking project.</p><p>If you've made this recipe and discovered something unexpected—a technique that worked better for you, a substitution that improved the result, an observation about your specific oven's behavior—I'd genuinely appreciate hearing about it. Baking is learned through shared experience and accumulated observation, not just written instructions. Your feedback helps others refine their technique as well.</p>