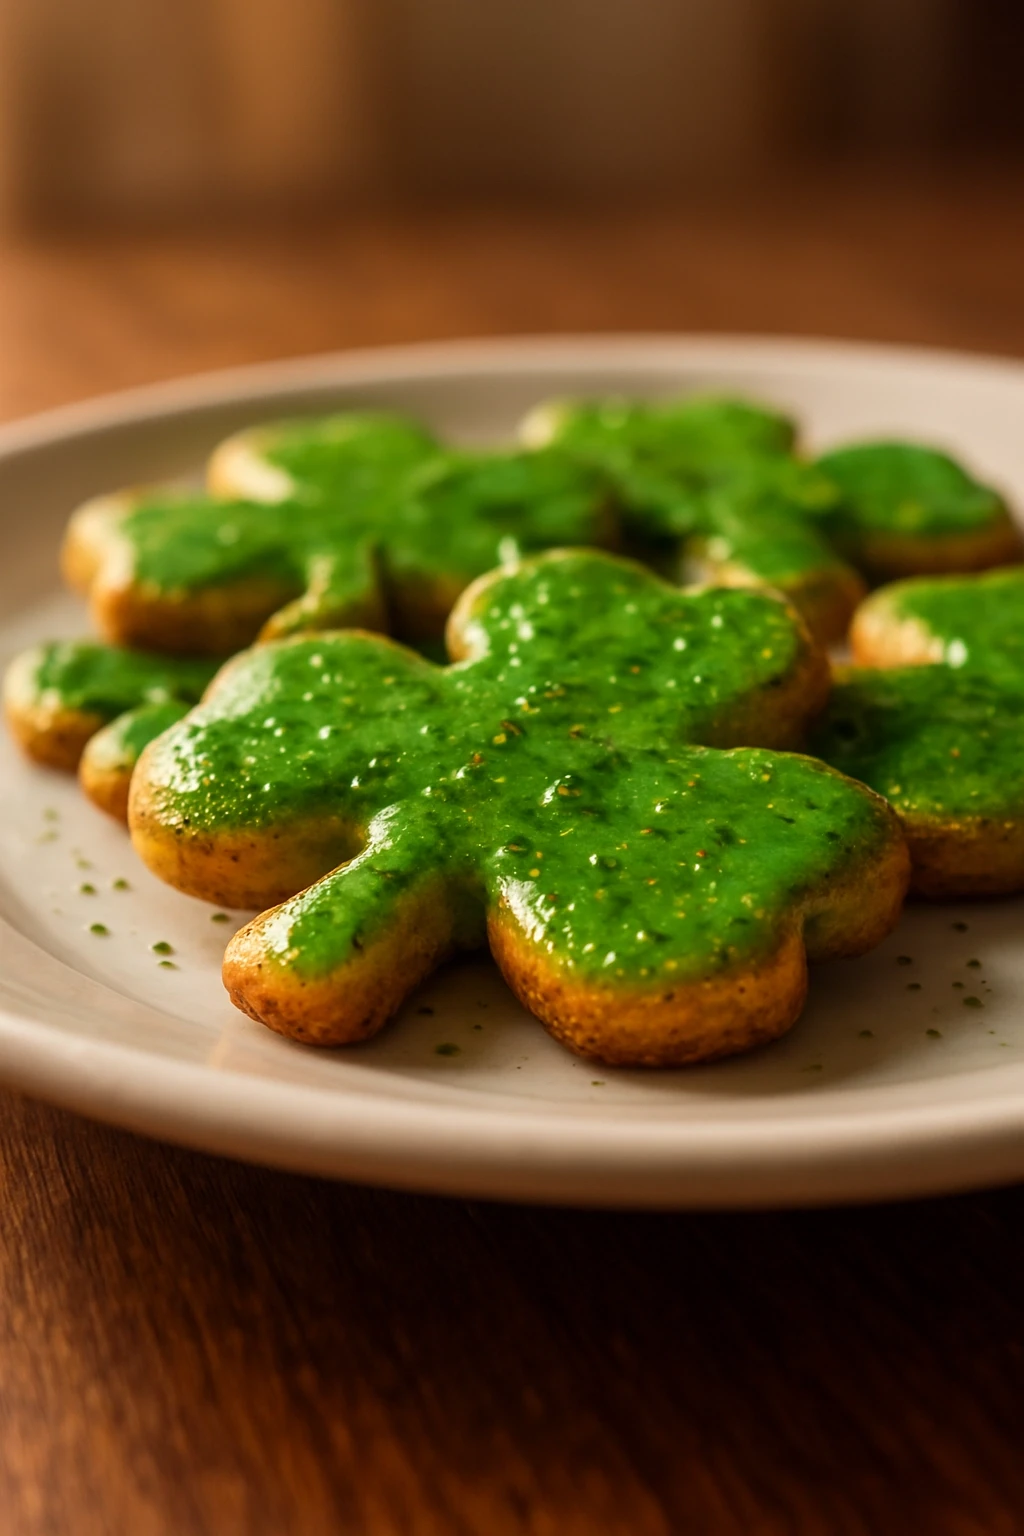
These vibrant shamrock cookies are a fun treat for St. Patrick's Day! With a hint of mint and a soft, chewy texture, they’re perfect for kids and adults alike.
Introduction
Growing up, St. Patrick's Day was always a big deal in my family. We’d gather around the kitchen, and my mom would whip up these delightful shamrock cookies that were not only festive but also delicious. I remember the first time I attempted to make them on my own; let’s just say the green food coloring ended up everywhere! But through a bit of trial and error, I perfected this recipe, and now I can't wait to share it with you. The secret ingredient? A touch of peppermint extract that gives these cookies a refreshing twist. They come out soft, chewy, and just the right amount of sweet, making them perfect for kids and adults alike. Whether you're hosting a party or just want to celebrate the day, these cookies are sure to bring smiles all around.
How To Do It
Step 1
Preheat your oven to 350°F (175°C). This step is crucial because starting with a hot oven ensures that the cookies bake evenly and rise properly. If the oven is not hot enough, your cookies might spread too much and become flat instead of fluffy. So, while the oven is heating, you can prepare your baking sheets by lining them with parchment paper to prevent sticking.
⏱ Time: 10 minutes
✓ Doneness: The oven should be preheated and ready when you can feel the heat radiating from the door.
Step 2
In a medium bowl, whisk together the flour, baking soda, and salt. This step is important because it evenly distributes the leavening agent and ensures that your cookies will rise nicely. If you skip this, you might end up with unevenly baked cookies. Set this mixture aside while you cream the butter and sugar.
⏱ Time: 5 minutes
✓ Doneness: The flour mixture should be well combined and free of lumps.
Step 3
In a large bowl, beat the softened butter and granulated sugar together until light and fluffy, about 3-5 minutes. This step incorporates air into the mixture, which is key for achieving that light texture in your cookies. Make sure to scrape down the sides of the bowl to ensure everything is mixed well. If you don’t beat it long enough, your cookies may end up dense instead of soft.
⏱ Time: 5 minutes
✓ Doneness: The mixture should be pale and fluffy, almost doubled in volume.
Step 4
Add in the egg, vanilla extract, peppermint extract, and green food coloring to the butter mixture, and mix until well incorporated. The food coloring not only gives the cookies their festive color but also adds a fun visual appeal. If you want a more vibrant green, feel free to add a bit more coloring, but be careful not to overdo it! Mix until everything is just combined to avoid overworking the dough.
⏱ Time: 3 minutes
✓ Doneness: The mixture should be a uniform green color with no streaks.
Step 5
Gradually add the flour mixture to the wet ingredients, mixing on low speed until just combined. This is where the dough starts to come together. Overmixing at this stage can lead to tough cookies, so mix just until you see no more flour. The dough should be soft and slightly sticky but hold its shape when scooped.
⏱ Time: 3 minutes
✓ Doneness: You should see a cohesive dough that is slightly sticky but not overly wet.
Step 6
Using a cookie scoop or tablespoon, drop the dough onto the prepared baking sheets, leaving about 2 inches between each cookie. This space allows the cookies to spread without merging into each other. If you want them to be perfectly round, you can roll them into balls before placing them on the sheet. The dough should hold its shape and not flatten too much before baking.
⏱ Time: 5 minutes
✓ Doneness: The cookies should be in evenly spaced mounds on the baking sheet.
Step 7
Bake in the preheated oven for 8-10 minutes, or until the edges are set but the centers are still soft. This is the sweet spot for chewy cookies! If you overbake them, they’ll become hard and lose that delightful texture. Keep an eye on them; they may look underbaked but will continue to firm up as they cool on the baking sheet.
⏱ Time: 10 minutes
✓ Doneness: The edges should be lightly golden while the centers remain soft.
Pro Tips
Chill the dough for 30 minutes before baking.
Chilling the dough helps to solidify the fat in the cookies, which can prevent them from spreading too much in the oven. If you skip this step, you might end up with flat cookies that aren’t as chewy.
Use a cookie scoop for even sizing.
Using a cookie scoop ensures that all your cookies are the same size, which means they’ll bake evenly. If you just eyeball it, you might end up with some overbaked and others underbaked.
Don’t skip the parchment paper.
Lining your baking sheet with parchment paper prevents the cookies from sticking and helps them to bake evenly. Otherwise, you might find yourself with a sticky mess that’s hard to remove.
Experiment with different extracts.
While peppermint is delicious, you can also try almond or vanilla for a different flavor profile. Just remember to adjust the amount, as some extracts are stronger than others.
Let the cookies cool on the baking sheet.
Allowing the cookies to cool for a few minutes on the baking sheet before transferring them to a wire rack helps them set. If you move them too soon, they might break apart.
Common Mistakes to Avoid
Overmixing the dough.
Why it happens Many home bakers think that mixing until everything is perfectly smooth will yield better results, but this can lead to tough cookies.
Fix Mix until just combined. You should still see a few streaks of flour; this will ensure your cookies stay tender.
Not preheating the oven.
Why it happens It’s easy to forget this step when you’re excited to bake, but starting with a cold oven can lead to uneven baking.
Fix Always preheat your oven to the required temperature before putting in your cookies. This ensures they bake evenly.
Using cold ingredients.
Why it happens Cold butter or eggs can prevent proper mixing and lead to dense cookies.
Fix Make sure your butter is softened and your eggs are at room temperature to achieve the best texture.
Ignoring baking times.
Why it happens It’s tempting to leave cookies in the oven longer for a firmer texture, but this can dry them out.
Fix Keep an eye on your cookies and take them out when the edges are set but the centers are still soft.
Variations
Chocolate Chip Shamrock Cookies
Add 1 cup of semi-sweet chocolate chips to the dough for a delightful twist. The rich chocolate pairs beautifully with the mint flavor.
Note: Just fold in the chocolate chips after mixing the dough, and watch the baking time closely as they may need an extra minute.
Gluten-Free Shamrock Cookies
Substitute the all-purpose flour with a gluten-free flour blend. This will allow those with gluten sensitivities to enjoy these festive treats.
Note: Make sure to use a blend that contains xanthan gum to help mimic the texture of traditional cookies.
Lemon Shamrock Cookies
Replace the peppermint extract with lemon extract for a zesty version. These cookies will have a refreshing citrus flavor that’s perfect for spring.
Note: Adjust the amount of food coloring as lemon extract can alter the color slightly.
Nutrition
Per Serving:
Nutritional values are estimates and may vary based on specific ingredients used.
Storage & Tips
Room Temperature
These cookies can be kept at room temperature for up to 3 days in an airtight container. Make sure to layer them between sheets of parchment paper to prevent sticking.
Refrigerator
Store in an airtight container for up to a week. The flavors may deepen, but the texture will be a bit firmer when served cold.
Freezer
You can freeze these cookies for up to 3 months. Wrap them tightly in plastic wrap and then in foil to prevent freezer burn.
Reheating
To reheat, pop them in the microwave for about 10-15 seconds or in a preheated oven at 350°F for 5 minutes. This will help restore their soft texture.
Make Ahead
You can prepare the dough a day in advance and refrigerate it. Just let it sit at room temperature for about 10-15 minutes before scooping and baking.
FAQ
Can I use butter instead of margarine?
Absolutely! I prefer using unsalted butter for the best flavor. Just make sure it’s softened to room temperature for easy mixing. Margarine can sometimes yield a different texture, so butter is usually the better choice.
What if I don’t have peppermint extract?
You can substitute with vanilla extract or even almond extract if you want a different flavor profile. Just keep in mind that peppermint is what gives these cookies their signature taste, so choose wisely!
How can I make these cookies more festive?
Try adding some colorful sprinkles on top before baking or drizzling melted white chocolate over cooled cookies for a fun touch. It adds a nice crunch and sweetness!
What’s the best way to store these cookies?
Store them in an airtight container at room temperature for up to 3 days. If you want them to last longer, freezing is a great option. Just make sure they’re well-wrapped.
Can I double the recipe?
Yes, you can easily double the recipe if you’re planning a big gathering. Just make sure you have enough baking sheets and space in your oven for all the cookies!
Final Thoughts
I hope you give these lucky shamrock cookies a try! They’re a fun and delicious way to celebrate, and I’d love to hear how they turn out for you.