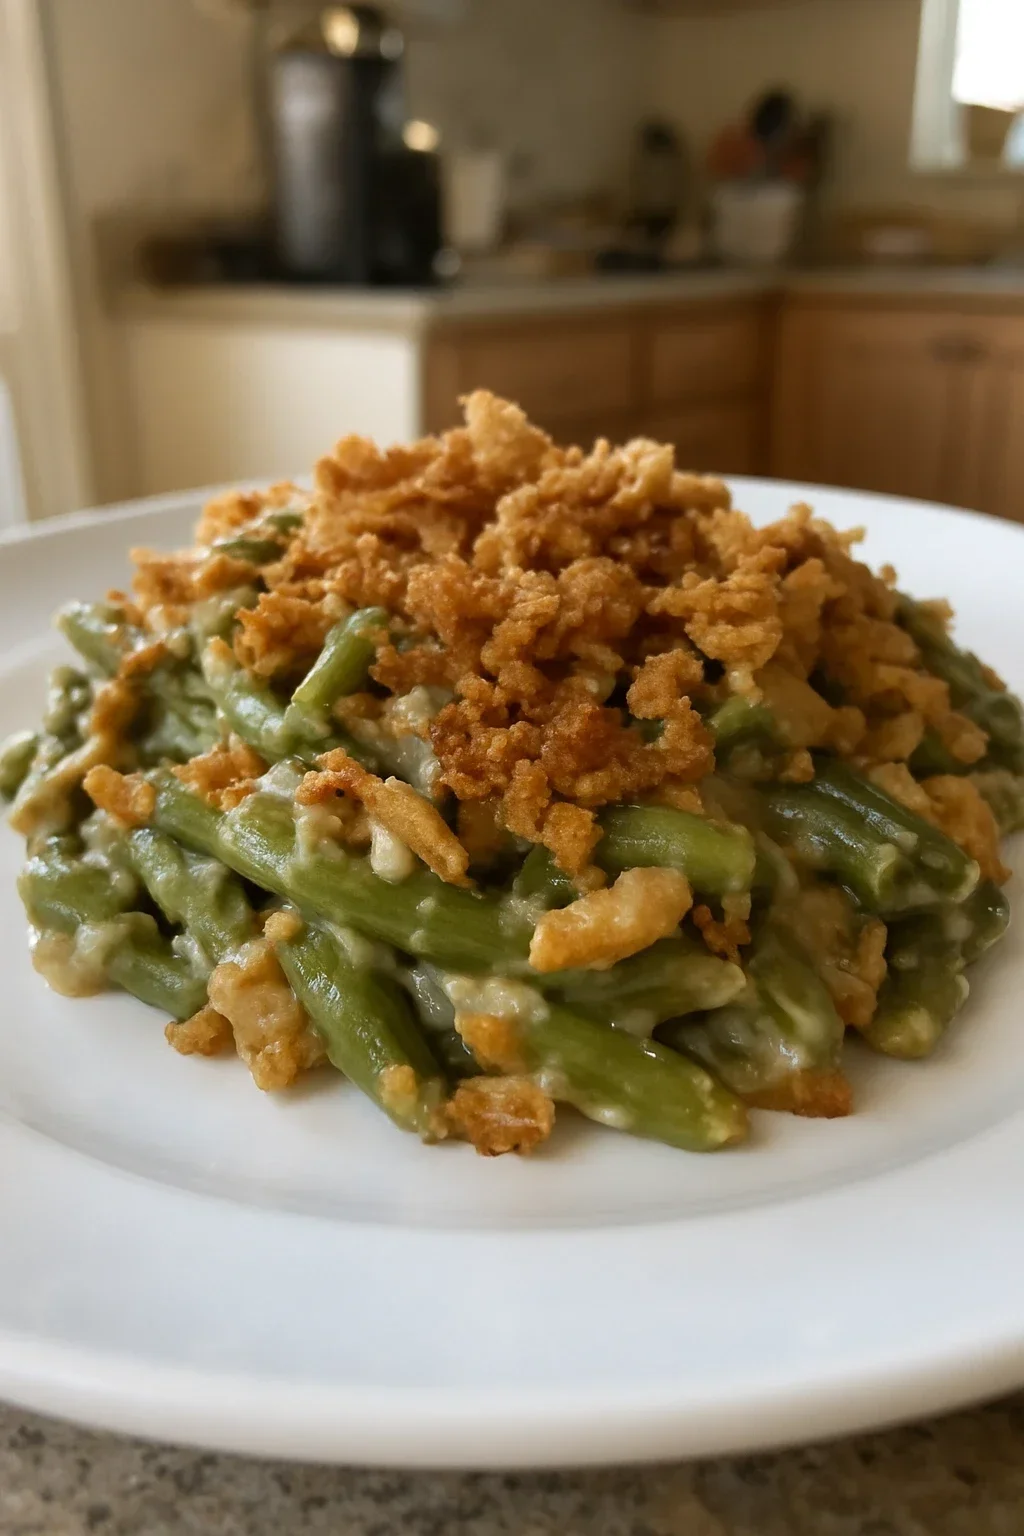
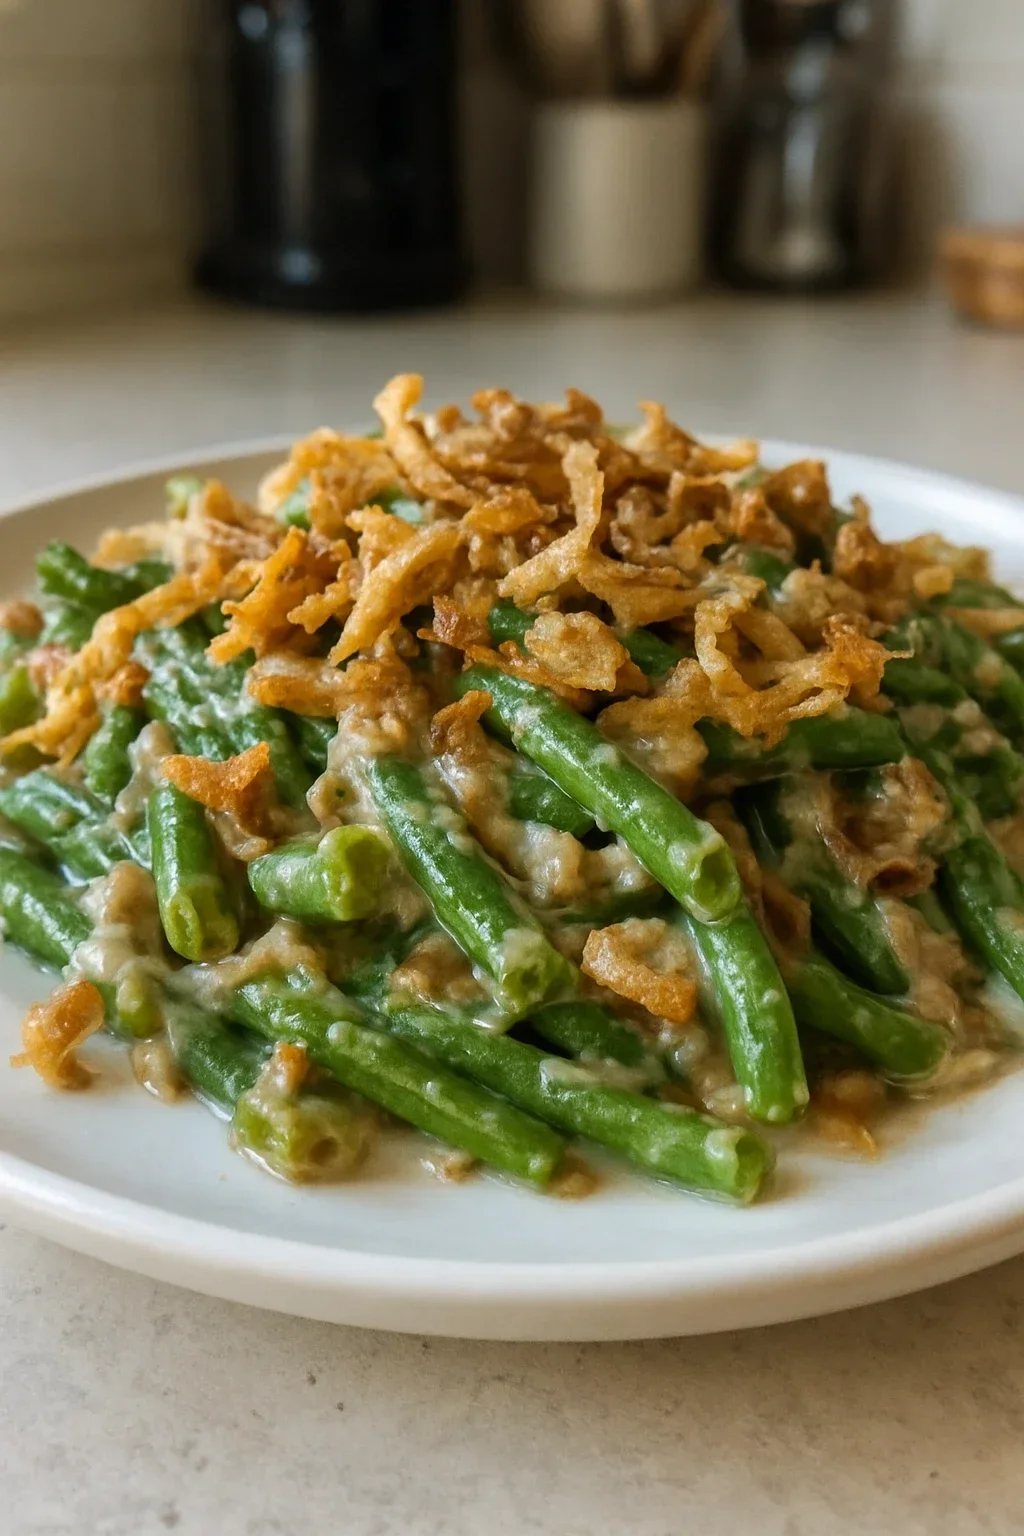
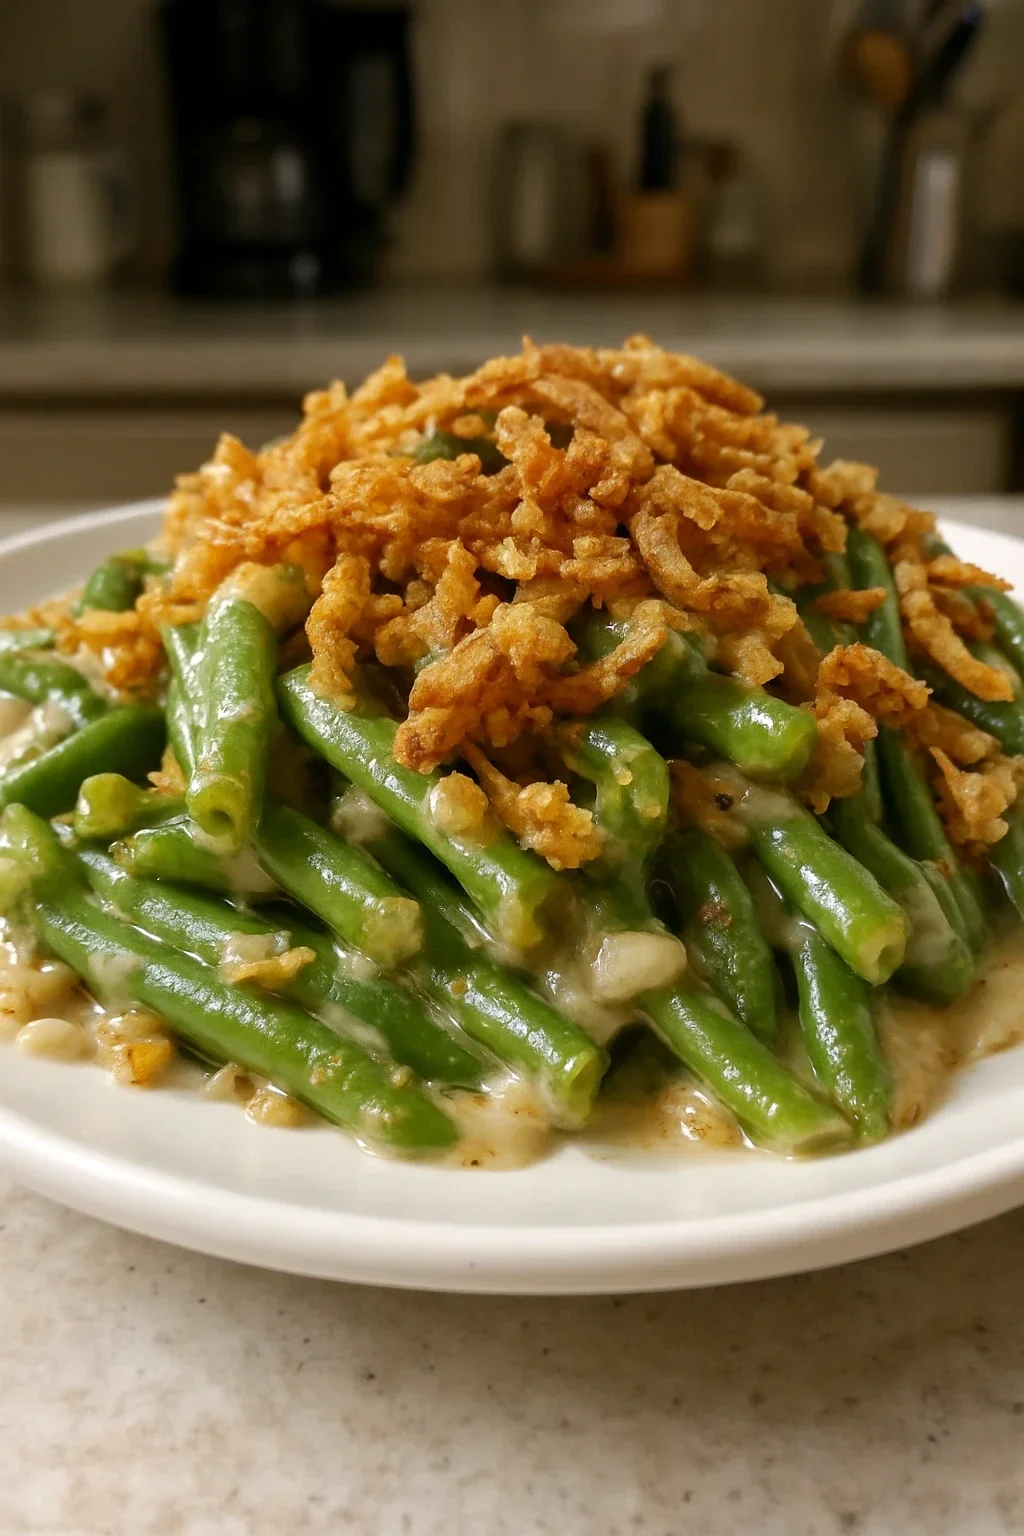
A green bean casserole that maintains proper vegetable texture and creamy sauce consistency. This recipe explains the technical reasons behind each step, from blanching green beans to timing the fried onion topping for maximum crunch.
What You'll Need
One 9x13 inch casserole, 6 servings
- 1.5 lbs (680g) fresh green beans, trimmed and cut into 1-inch pieces
- 1 can (10.5 oz / 298g) cream of mushroom soup, condensed
- 1/2 cup (120ml) whole milk
- 1 cup (115g) sharp cheddar cheese, shredded
- 1.5 cups (45g) crispy fried onions, divided
- 1/2 tsp (3g) fine sea salt
- 1/4 tsp (0.5g) black pepper
- 2 tbsp (30ml) unsalted butter (optional, for sautéing mushrooms if using fresh)
How To Do It
Step 1
Set your oven to 350°F (175°C) and butter a 9x13 inch baking dish—I use a ceramic one because it distributes heat more evenly than metal. Position the rack in the center of the oven. While the oven heats, get your water boiling.
⏱ Time: 5 minutes
✓ Doneness: Oven reaches temperature, dish is ready, water pot is on the stove
Step 2
Fill a large pot with water—enough that the beans can move freely when you add them. Add about 1 teaspoon of salt per quart of water; this isn't just for seasoning but actually helps the beans retain their green color by replacing magnesium ions in the chlorophyll. Bring it to a hard, rolling boil over high heat. Drop the trimmed green beans in and set a timer for exactly 5 minutes. I've learned not to trust my instincts here—those extra 2 minutes that seem harmless will turn the beans from tender-crisp to disappointingly soft. When the timer sounds, you'll see the beans have turned a vibrant, almost neon green. They'll pierce easily with a fork but still have some resistance when you bite down.
⏱ Time: 5 minutes
✓ Doneness: Beans are impossibly bright green, fork pierces with slight resistance, water has returned to a full boil
Step 3
Pour the beans into a colander immediately—don't walk away to check your phone or they'll keep cooking in the residual heat. Let them drain for about a minute, shaking the colander a few times. Don't rinse them under cold water despite what your instincts might tell you. That thin layer of starch on their surface will help the sauce grab onto each bean later. The first time I rinsed them, I couldn't figure out why my sauce pooled at the bottom of the dish instead of coating the beans evenly.
⏱ Time: 1 minute
✓ Doneness: No pooling water remains, beans are steaming slightly
Step 4
Grab a medium bowl and add the condensed soup straight from the can—it'll look thick and almost paste-like. Pour in the milk and whisk steadily for about 30 seconds until the mixture smooths out and you can't see any flour streaks. Don't whisk aggressively or you'll incorporate too much air and end up with a foamy texture. The mixture should flow slowly off your whisk but still have good body.
⏱ Time: 2 minutes
✓ Doneness: Mixture is completely smooth, no lumps visible, consistency resembles thick cream
Step 5
Stir in the shredded cheddar cheese with a wooden spoon. The residual warmth from the soup will melt it within a minute or so—you'll see it transform from distinct shreds into a cohesive, glossy mixture. Add the salt and pepper now, but taste a small spoonful before adding more salt. The soup itself contains a fair amount of sodium, and I've oversalted this more than once by not accounting for that.
⏱ Time: 2 minutes
✓ Doneness: Cheese has melted completely, no shreds remain, sauce is smooth and slightly glossy
Step 6
Transfer the drained beans to your prepared baking dish and pour the creamy mixture over them. Use a rubber spatula to fold everything together gently—I mean gently. Aggressive stirring breaks the beans into pieces, and you'll end up with more of a bean mash than a casserole. Fold slowly until every bean has a coating of sauce. You shouldn't see bare beans or pools of liquid gathering at the bottom.
⏱ Time: 2 minutes
✓ Doneness: Every bean is coated, mixture looks uniform, no liquid pooling at edges
Step 7
Measure out about three-quarters of your fried onions—roughly 1 cup—and scatter them evenly across the top. Save the rest in the canister. This is the move that took me several attempts to figure out. If you add all the onions now, they'll absorb moisture during baking and turn soft. The two-stage approach means you'll have both cooked onions that have mingled with the sauce and fresh ones that stay crispy.
⏱ Time: 1 minute
✓ Doneness: Onions distributed evenly, some gaps visible where sauce shows through
Step 8
Slide the casserole into the oven and bake for 20 minutes. At exactly 20 minutes, pull the dish out (use thick oven mitts—the handles get hot) and sprinkle the remaining fried onions across the top. You'll notice the sauce has started bubbling at the edges and the first layer of onions has turned golden. Those fresh onions you're adding now will warm through in the final 5 minutes without losing their crunch.
⏱ Time: 20 minutes, then add remaining onions
✓ Doneness: Sauce bubbles gently at edges, first layer of onions is golden, beans are visibly hot
Step 9
Return the casserole for the final 5 minutes. When you pull it out, the sauce should be bubbling actively around the perimeter and the top onions will have warmed and taken on just a hint of color. Let it sit for 3 minutes before serving—this brief rest allows the sauce to thicken slightly so it doesn't run all over the plate when you scoop it out.
⏱ Time: 5 minutes baking, 3 minutes resting
✓ Doneness: Active bubbling at edges, top onions are warm and lightly golden, no vigorous boiling in center
Pro Tips
Set a kitchen timer for the blanching step and don't eyeball it. I've tested this repeatedly, and the difference between 5 and 7 minutes is substantial.
Beyond 5 minutes, the beans' cell walls collapse and they lose both their structure and their vibrant color. The enzyme polyphenol oxidase starts breaking down chlorophyll rapidly after 5 minutes, turning the beans from bright green to a dull olive or even gray-green. A timer removes guesswork.
Choose beans that snap cleanly when you bend them. If they bend without breaking, they're old and their cell structure has already started breaking down.
Fresh beans have intact cell walls filled with moisture under pressure. When you bend them, this pressure causes a clean snap. Old beans have lost moisture and their cells have begun degrading, so they bend limply instead. Fresh beans hold up better during cooking.
Use sharp cheddar, not mild. The aging process breaks down proteins in the cheese, which helps it melt into the sauce more smoothly and contributes deeper flavor.
Young cheeses have proteins that haven't broken down much, so they don't integrate into sauces as gracefully. Aged cheddar has undergone proteolysis—the breakdown of proteins into smaller compounds—which creates both better melting properties and more complex flavor. I've compared the two side by side multiple times.
Split the fried onions between the beginning and the end of baking. This single adjustment transformed my casserole from mediocre to genuinely good.
Fried onions lose crispness rapidly when exposed to moisture. Adding all of them at the start means they'll be soggy by serving time. The two-stage approach provides contrast—some onions that have absorbed sauce flavor and some that maintain their crunch. After serving this both ways to family, everyone prefers the version with crispy onions.
Skip rinsing the beans after blanching. That thin starch coating helps the sauce adhere to each bean instead of sliding off.
When vegetables are blanched, surface starches gelatinize slightly and create a tacky coating. This coating acts like velcro for creamy sauces. Rinsing removes this starch and leaves a slippery surface that doesn't hold sauce well. I learned this after wondering why my rinsed beans ended up swimming in sauce rather than coated with it.
If making ahead, assemble everything except the onions up to 24 hours in advance. Keep it refrigerated, then add onions just before baking.
The assembled casserole actually improves overnight as the beans absorb some sauce and the flavors meld. But fried onions lose crispness immediately when exposed to humid ingredients, so add them only when you're ready to bake. This is how I handle Thanksgiving prep—assembly the night before, onions day-of.
Common Mistakes to Avoid
Blanching beans until they're completely tender, sometimes 8-10 minutes or more
Why it happens Most people grew up eating overcooked vegetables and assume that's the target texture. Or they lose track of time while preparing other ingredients.
Fix Set a timer for 5 minutes and drain immediately when it sounds. If you're juggling multiple tasks, transfer the drained beans to a bowl of ice water to stop the cooking instantly. I keep a bowl of ice water ready specifically for this—it's saved me several times when I've gotten distracted.
Adding all the fried onions at once, then wondering why they're soggy at serving time
Why it happens It seems efficient to add all toppings at the beginning, and most people don't realize fried onions absorb moisture during baking.
Fix Divide them in two. Add three-quarters at the start and reserve one-quarter for the final 5 minutes. The earlier batch contributes flavor, the later batch contributes crunch. I've served this casserole to the same group of people using both methods, and the two-stage version wins every time.
Using frozen beans without adjusting the technique, treating them like fresh
Why it happens Frozen beans seem like a convenient shortcut, but they've already been blanched during processing and don't need the same treatment.
Fix Skip the blanching entirely if using frozen. Add them directly to the sauce mixture—they'll finish cooking in the oven. Reduce total baking time by about 5 minutes since they're already partially cooked. The final texture won't be quite as firm as fresh beans, but it's acceptable.
Rinsing the blanched beans after draining, thinking it stops the cooking
Why it happens Rinsing seems logical—it stops residual cooking and removes excess starch. But that starch is actually beneficial here.
Fix Just drain and use immediately. The beans will cool enough on their own, and the starch coating helps the sauce stick. When I stopped rinsing, my sauce distribution improved noticeably—no more pools of liquid at the bottom with bare beans on top.
Using condensed soup straight from the can without thinning it, creating a paste-like casserole
Why it happens The recipe says 'cream of mushroom soup' and people dump it in without reading that it needs milk added.
Fix Always thin condensed soup with the amount of milk specified. The thinned mixture should coat a spoon but still flow when you tilt the bowl. If you skip this step, you'll end up with something more like a casserole-shaped brick than an actual side dish.
Variations
Fresh Mushroom Addition
Slice 8 oz of mushrooms (I prefer cremini) and sauté them in 2 tablespoons of butter over medium-high heat for 5-7 minutes until they've released their water and turned golden. Fold them into the soup mixture before combining with beans. This adds earthiness and makes the mushroom element more prominent.
Note: Fresh mushrooms are about 90% water. Sautéing them first drives off this moisture and concentrates their flavor. If you add raw mushrooms, they'll release liquid during baking and thin your sauce. I learned this after a watery disaster one Thanksgiving.
Gluten-Free Version
Most fried onion brands are now gluten-free, but verify the label. Check your cream of mushroom soup or make a quick substitute: sauté mushrooms in butter, add 1 cup broth, thicken with 1 tablespoon cornstarch whisked into 2 tablespoons cold water.
Note: Cornstarch thickens more aggressively than flour-based roux, so start conservatively. It also creates a shinier, more translucent sauce. If your sauce looks too glossy, that's normal for cornstarch-based thickeners.
Dairy-Free Casserole
Replace the condensed soup with dairy-free cream soup (Pacific Foods makes one) or a homemade version using vegetable broth and cornstarch. Use dairy-free cheese shreds—I've had good results with Violife. Verify your fried onions are dairy-free.
Note: Dairy-free cheeses behave differently when heated. They tend to clump if added to hot liquid too quickly. Stir them in gradually and avoid high heat. The final sauce may be slightly thinner than the dairy version, so you might need an extra tablespoon of plant milk.
Panko Herb Topping
Replace fried onions with 3/4 cup panko breadcrumbs mixed with 3 tablespoons melted butter, 1 teaspoon garlic powder, and 1 tablespoon fresh thyme. Spread this over the casserole for the final 10 minutes of baking.
Note: Breadcrumb toppings brown faster than fried onions, so watch them closely after 7 minutes to prevent burning. The butter's fat helps them crisp evenly and turn golden. This variation gives you a more refined presentation if fried onions feel too casual.
Creamed Corn Combination
Replace 8 oz of the green beans with one 15 oz can of creamed corn, drained well. The corn adds sweetness and changes the texture profile slightly. Reduce the milk to 1/4 cup since creamed corn contributes liquid.
Note: Canned creamed corn already contains thickening starch, so your sauce will be naturally thicker. If it seems too thick, thin it with an extra tablespoon of milk. I make this variation sometimes when I want something a bit sweeter on the table.
Nutrition
Per Serving:
approximately 285
Calories
Values are estimates and will vary based on specific brands and exact measurements. These assume whole milk, standard cream of mushroom soup, and traditional fried onions. Dairy-free substitutions will alter the nutritional profile.
Storage & Tips
Refrigerator
Store leftovers in an airtight container for up to 4 days. The sauce thickens as it cools, which is normal—the starches continue setting even after you remove it from heat. The green beans soften slightly with each passing day, though the casserole remains perfectly edible. The fried onion topping will gradually lose crispness even in proper storage.
Freezer
The unbaked, assembled casserole (without onions) freezes well for up to 3 months when wrapped tightly in plastic wrap and foil. Thaw overnight in the refrigerator before baking as directed. Already-baked casserole can technically be frozen, but the texture becomes noticeably softer upon thawing as the beans break down further. The sauce may separate slightly but will recombine when reheated.
Reheating
Reheat in a 325°F oven covered with foil for 15-20 minutes until warmed through. The lower temperature prevents the sauce from breaking or separating—I've found that higher heat causes the cheese to separate from the liquid. If the casserole seems dry, add 2-3 tablespoons of milk before reheating. Add fresh fried onions just before serving, not during reheating, to maintain their crunch.
Make Ahead
Assemble the entire casserole—beans, sauce, cheese—up to 24 hours ahead and refrigerate without the onions. Cold casseroles need about 5 extra minutes in the oven, so increase total baking time to 30 minutes. Add onions as directed in the recipe. I do this for every Thanksgiving to reduce day-of stress.
FAQ
Why did my green beans turn gray instead of staying bright green?
Gray beans indicate that polyphenol oxidase enzymes oxidized the chlorophyll—the green pigment. This happens when beans are blanched beyond 5 minutes or stored without blanching before cooking. Always blanch fresh beans for exactly 5 minutes. If using canned or frozen beans, this oxidation has already occurred during processing and can't be reversed.
Can I assemble this the day before and bake it the next day?
Yes, and it actually improves the flavor slightly. Assemble everything except the onions, refrigerate up to 24 hours, then bake from cold (add 5 minutes to the time). Add fresh onions with 5 minutes remaining. The beans absorb some sauce overnight, which creates a more cohesive dish.
What if I don't have cream of mushroom soup?
Sauté 6 oz sliced mushrooms in 2 tablespoons butter until golden, add 1 cup broth, then thicken with 1 tablespoon cornstarch whisked into 2 tablespoons cold water. Simmer until thick. This homemade version often tastes cleaner and less processed than canned soup.
Why are my fried onions soggy?
They absorbed moisture during baking. Only add three-quarters of them at the beginning and save one-quarter for the final 5 minutes. This ensures you have crispy onions on top even if the bottom layer softens. I made this mistake repeatedly before figuring out the two-stage approach.
Can I use frozen green beans instead of fresh?
Yes, but skip the blanching—frozen beans are already blanched during processing. Add them directly to the sauce mixture and reduce total baking time by 5 minutes. The texture will be slightly softer than fresh beans but still acceptable for this application.
How long does leftover casserole last in the fridge?
Properly stored in an airtight container, 3-4 days. The sauce stays stable, but the beans continue softening with each passing day. The crispy onion topping absorbs moisture even when stored properly, so consider adding fresh onions when reheating if texture matters to you.
Final Thoughts
After making this casserole more times than I can count, I've learned that the details matter more than the ingredient list. The 5-minute blanching window, the two-stage onion addition, the proper sauce consistency—these aren't fussy chef techniques. They're the difference between a casserole people actually want seconds of and one they politely eat because it's Thanksgiving. Once you understand why each step works, you can adjust confidently for different ingredients or dietary needs while keeping the balance that makes this dish succeed.