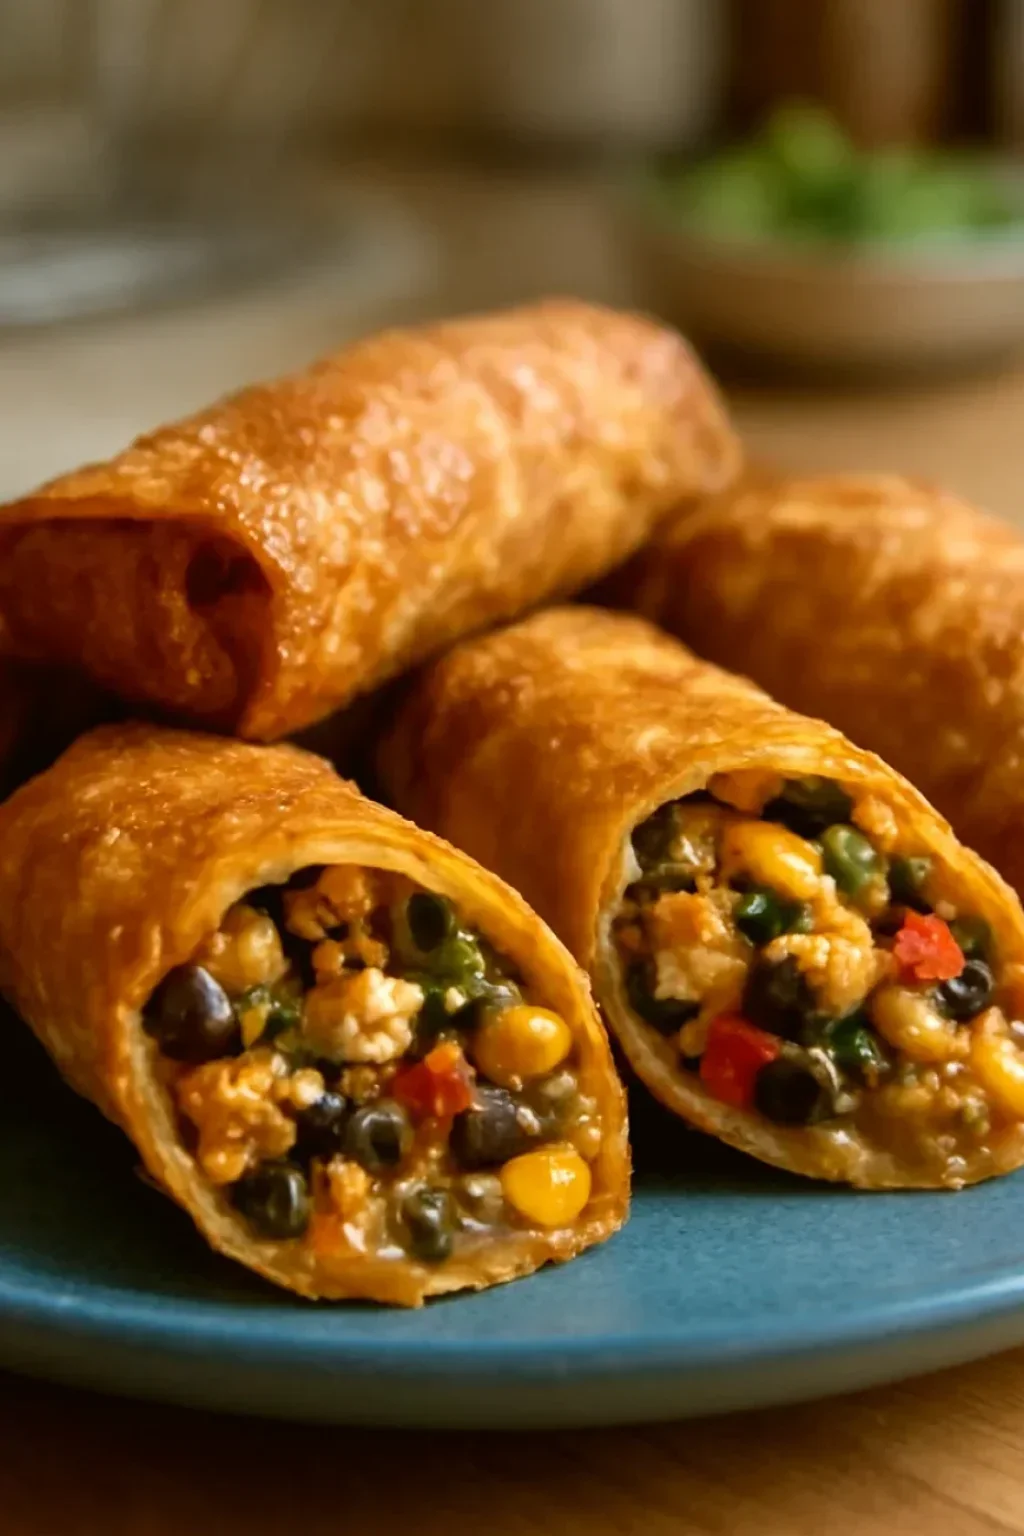
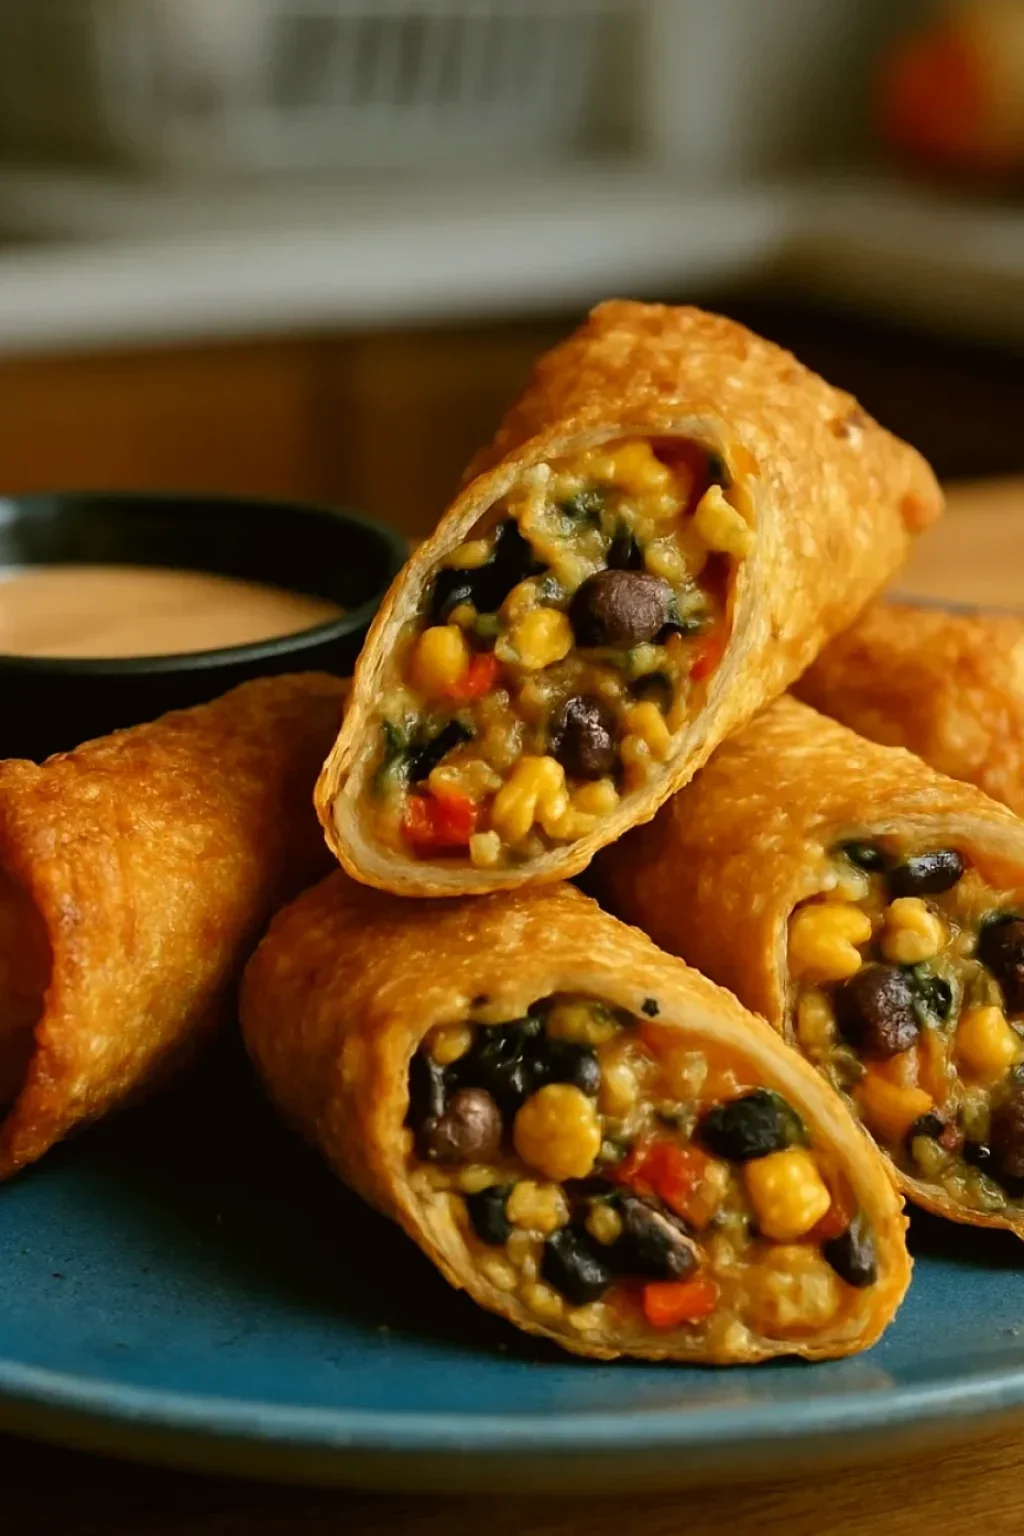
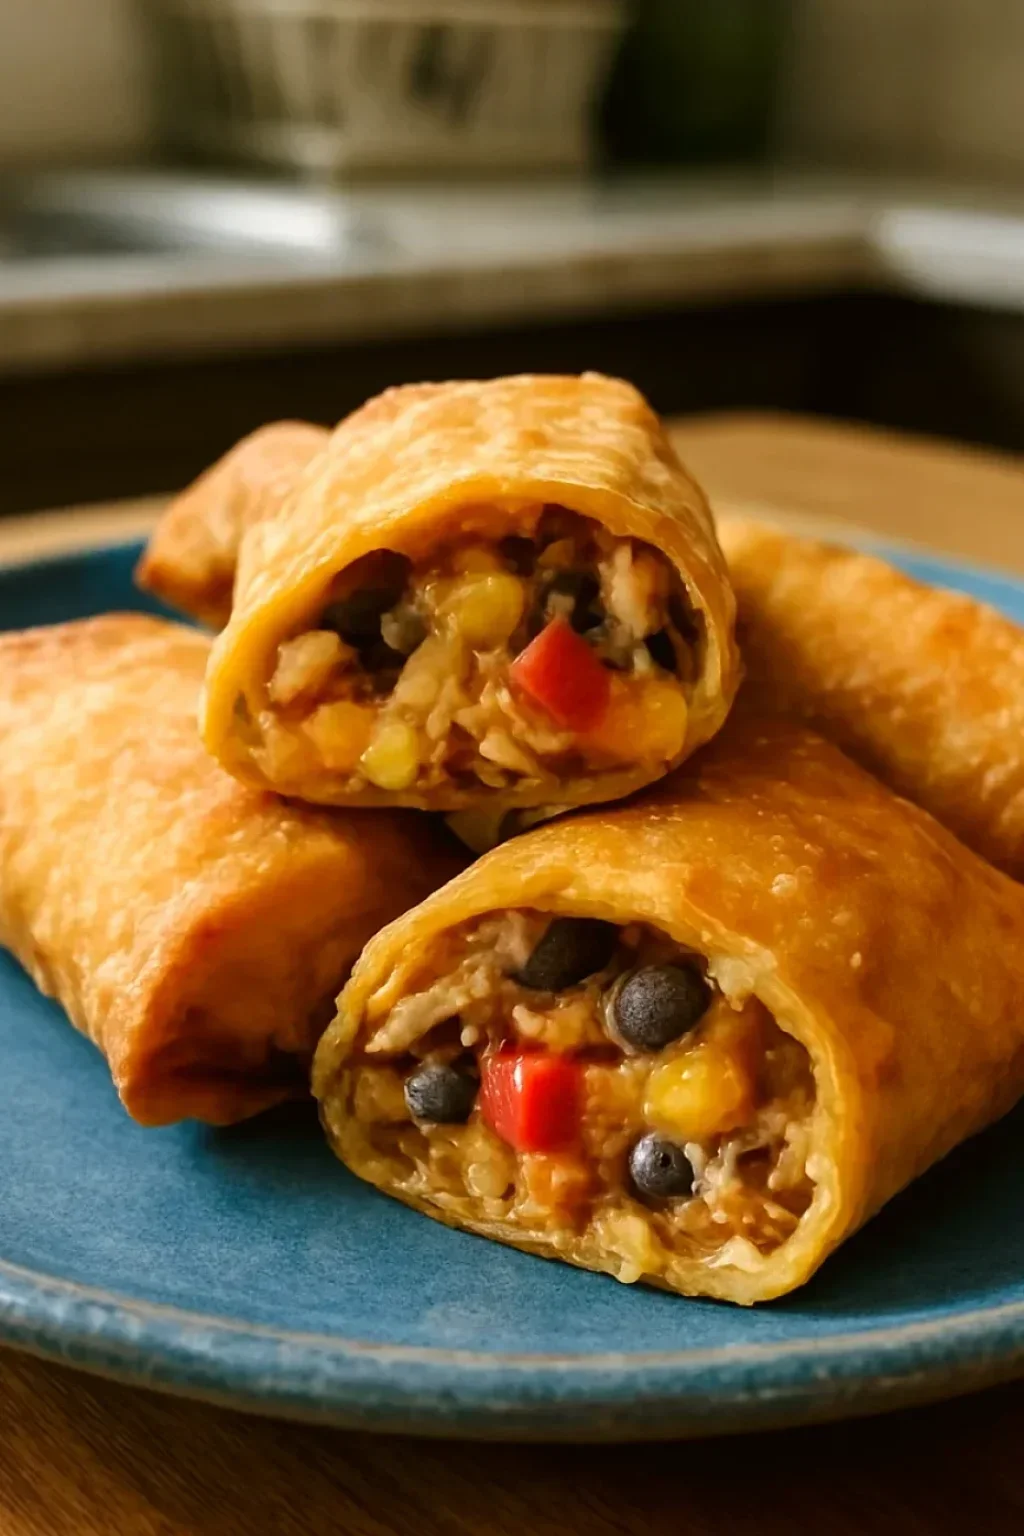
A guide to making shatteringly crisp southwest eggrolls at home using precise moisture control, proper oil temperature, and a balanced filling. Learn the cooking science behind wrapper texture, filling stability, and deep frying technique that produces restaurant-quality results.
What You'll Need
12 eggrolls, approximately 3-4 per serving as an appetizer
- 1 cup (140g) cooked chicken, shredded — rotisserie chicken, leftover roasted, or poached
- 1/2 cup (85g) black beans, canned, rinsed and thoroughly drained
- 1/2 cup (75g) corn kernels — frozen and thawed, or fresh corn cut from cob
- 1/2 cup (55g) sharp cheddar cheese, shredded from block (not pre-shredded)
- 1/4 cup (40g) red bell pepper, finely diced — about 1/4 of a medium pepper
- 2 tablespoons green onions, thinly sliced — white and light green parts only
- 1 teaspoon (2g) chili powder
- 1/2 teaspoon (1g) ground cumin
- 1/4 teaspoon (0.5g) garlic powder
- 1/4 teaspoon (1.5g) fine sea salt
- 1/8 teaspoon (0.3g) black pepper
- 12 eggroll wrappers — refrigerated section, not frozen, approximately 3.5 inches square
- 2 cups (480ml) vegetable or canola oil for frying — high smoke point neutral oils only
- Water for sealing
How To Do It
Step 1
Remove the chicken from the refrigerator and shred into pieces no larger than 1/4 inch. Place the shredded chicken on a clean cutting board and run your knife through it once or twice more to ensure uniform, smaller pieces. Large pieces of chicken create air pockets in the filling that allow oil to infiltrate during frying, resulting in greasy eggrolls.
⏱ Time: 5 minutes
✓ Doneness: All chicken pieces are uniform in size, no chunks larger than 1/4 inch visible
Step 2
Rinse the canned black beans under cold running water in a colander while gently stirring with your fingers to remove the starch coating. The rinsing water will initially be milky; continue rinsing until it runs nearly clear. This step removes excess sodium and the starch slurry that contributes to greasiness. After rinsing, let the beans drain in the colander for 2 minutes.
⏱ Time: 2 minutes
✓ Doneness: Rinsing water runs nearly clear with no milky appearance, beans feel dry to the touch
Step 3
Spread the rinsed and drained black beans on a clean paper towel. Gently pat the top with another paper towel to absorb surface moisture. Let the beans sit on the towel for 3-5 minutes—do not skip this step. The paper towel continues to wick moisture from the bean surfaces. After 5 minutes, the beans should feel completely dry when touched. This is one of the most important steps for crispy eggrolls.
⏱ Time: 5 minutes
✓ Doneness: Beans feel completely dry with no moisture transferring to your finger when touched
Step 4
If using frozen corn, place it in a colander and run under cool water until completely thawed, gently stirring occasionally. Allow to drain for 2 minutes. If using canned corn, drain the liquid and rinse similarly. Spread the corn on a clean paper towel and pat dry, letting it sit for 2-3 minutes as with the beans.
⏱ Time: 3 minutes
✓ Doneness: Corn kernels are completely thawed, feel dry to the touch, no pooled water on the towel
Step 5
In a large mixing bowl, combine the shredded chicken, dried black beans, dried corn kernels, shredded cheddar cheese, finely diced red bell pepper, and sliced green onions. Use a fork or spatula to combine, stirring gently to distribute ingredients evenly without crushing the beans or breaking the corn kernels.
⏱ Time: 2 minutes
✓ Doneness: All ingredients are evenly distributed throughout the mixture with no streaks of single ingredients visible
Step 6
Measure the chili powder, cumin, garlic powder, salt, and black pepper into a small dish. Add these spices to the filling mixture. Stir thoroughly with a fork for approximately 1 minute, ensuring the spices coat all ingredients evenly. Look for a uniform reddish-brown color throughout the mixture. If you see white or yellow streaks of unseasoned chicken or visible spice particles, continue stirring until the color is consistent.
⏱ Time: 2 minutes
✓ Doneness: Mixture has uniform reddish-brown color with no visible unseasoned chicken, all spice particles have dissolved into the mixture
Step 7
Transfer the filling to a small bowl and place in the refrigerator while you prepare the wrappers. Cool filling prevents the cheese from softening and releasing fat before frying. If the kitchen is warm, refrigerate the filling for 15-20 minutes. If the kitchen is cool (below 70°F), 5-10 minutes is sufficient. While the filling chills, prepare a work surface: a cutting board or large plate works well. Have a small bowl of water nearby for sealing.
⏱ Time: 5-20 minutes depending on kitchen temperature
✓ Doneness: Filling is cool to the touch, slightly firmer than at room temperature
Step 8
Remove eggroll wrappers from the refrigerator. These typically come in a stack of about 25 wrapped in plastic. The wrappers should be at room temperature before working with them. If they've been refrigerated, let them sit out for 5 minutes. Cold wrappers become brittle and tear easily. Place one wrapper on a clean, completely dry work surface with one corner pointing toward you, forming a diamond shape.
⏱ Time: 1 minute
✓ Doneness: Wrapper is at room temperature, feels pliable but not sticky
Step 9
Remove 2 heaping tablespoons of filling from the refrigerated mixture and place it on the lower third of the wrapper, about 1 inch above the bottom corner. The filling should form a compact log shape approximately 4 inches long and 1.5 inches wide. Do not overfill—this is a common mistake that causes rupturing during frying. The amount seems small, but it's exactly right for a wrapper of this size.
⏱ Time: 30 seconds per wrapper
✓ Doneness: Filling forms a compact, uniform log shape with no stray pieces extending beyond the log
Step 10
Fold the bottom corner of the wrapper up and over the filling, pressing gently to remove any air pockets trapped beneath. This first fold should press the wrapper snugly against the filling but not so forcefully that the wrapper tears. You should feel the filling compress slightly but not squeeze out.
⏱ Time: 10 seconds
✓ Doneness: Bottom corner folds cleanly over the filling without tearing, no air pockets visible
Step 11
Fold the left corner toward the center, pressing gently along the edge. Then fold the right corner toward the center, overlapping the left corner slightly. The wrapper now resembles an envelope with the top corner still unfolded. Press along the left and right seams where the side corners overlap to ensure they stick to the filling and remain folded during rolling.
⏱ Time: 15 seconds
✓ Doneness: Side corners fold cleanly to center without bunching, edges stick to the filling
Step 12
Roll the eggroll tightly from the filled end toward the unfolded top corner. Roll firmly but not so forcefully that the wrapper tears. The roll should feel taut, with no air pockets when gently squeezed. When you reach the final top corner, dip your finger in the small bowl of water and wet the surface of the top corner.
⏱ Time: 20 seconds per roll
✓ Doneness: Roll is tight and cylindrical with no visible air pockets, top corner is wet and ready to seal
Step 13
Press the wet top corner firmly to the eggroll, sealing it shut. The seam should feel sticky and adhered. A properly sealed eggroll will not burst open during frying. Place the finished eggroll seam-side down on a parchment-lined baking sheet. The parchment prevents the wrapper from sticking to the pan.
⏱ Time: 5 seconds
✓ Doneness: Top corner adheres firmly when pressed, seal does not open when lightly tugged
Step 14
Repeat the assembly process with remaining wrappers and filling, placing each finished eggroll seam-side down on the parchment paper. Space them so they don't touch each other. Once all eggrolls are assembled, leave them on the counter while you heat the oil. The wrappers should return to room temperature; cold eggrolls will cool the oil significantly when added, reducing the surface temperature and preventing proper crisping.
⏱ Time: 10-12 minutes total for all 12 eggrolls
✓ Doneness: All eggrolls are uniform in size and tightly wrapped, assembled eggrolls feel slightly firm but not hard
Step 15
Pour the oil into a heavy-bottomed pot or deep skillet to a depth of 2 inches. The pot should be large enough that the oil depth is at least 2 inches but doesn't fill more than halfway up the sides—this provides space for oil to bubble and foam during cooking without overflowing. Place the pot over medium-high heat. Do not use the stove's highest heat setting, which can cause uneven heating and oil breakdown.
⏱ Time: 0 minutes (preparation)
✓ Doneness: Oil is in pot, pot is on burner
Step 16
Insert a deep-fry or candy thermometer into the oil, ensuring the tip is submerged but not touching the bottom of the pot. As the oil heats, you'll notice the surface beginning to shimmer after about 3-4 minutes. At 5-7 minutes, the oil should reach 350°F (175°C). This temperature is crucial—too low and eggrolls absorb oil; too high and they burn externally before heating internally. A thermometer removes all guesswork. While heating, listen for the subtle change in oil sound—initially it's completely quiet, but as it heats, a very faint sizzling develops (from moisture in the oil itself). This is normal.
⏱ Time: 5-7 minutes
✓ Doneness: Thermometer reads 350°F (175°C), oil shimmers across surface, very faint sizzling sound audible
Step 17
Test the oil temperature readiness by dropping a small piece (about 1/4 inch square) of eggroll wrapper into the oil. It should sizzle immediately and rise to the surface within 1-2 seconds. This confirms the oil has reached the correct temperature. If it sinks initially or doesn't sizzle, wait another 30-60 seconds and test again.
⏱ Time: 30 seconds
✓ Doneness: Wrapper piece sizzles immediately upon contact, rises to surface within 1-2 seconds
Step 18
Using a slotted spoon, spider strainer, or long-handled metal tongs, carefully lower 3-4 eggrolls into the hot oil. Do not exceed 4 eggrolls at once; crowding the pot drops the oil temperature too drastically, causing oil absorption instead of crisping. Lower the eggrolls gently to avoid splashing hot oil. Once lowered, do not move or flip them immediately. They must fry for exactly 90 seconds on the first side without disturbance. This 90-second window allows the wrapper surface to set and form a protective crust before the interior heats.
⏱ Time: 90 seconds (undisturbed)
✓ Doneness: Eggrolls float in oil without sinking, oil around them bubbles steadily, bottom surface turns golden brown
Step 19
After 90 seconds, gently turn each eggroll using tongs or a slotted spoon, rotating them slowly to avoid tearing the wrapper. The first side should be golden brown and feel firm when gently pressed. Continue frying for another 90 seconds, then check the color. The eggrolls should now be an even, deep golden brown on multiple sides. If they appear pale, continue frying for another 30 seconds. The total frying time is usually 2.5-3.5 minutes depending on exact oil temperature and eggroll size.
⏱ Time: 90 seconds per side, then 30-60 seconds as needed
✓ Doneness: Wrapper is deep golden brown on all visible sides, feels firm and crispy when gently pressed, no pale patches remain
Step 20
Using a slotted spoon or spider strainer, carefully remove the fried eggrolls from the oil and transfer them to a wire rack positioned over a sheet pan or large plate. The wire rack is critical here—it allows air to circulate around the eggrolls on all sides, dissipating steam and maintaining crispness. Do not place eggrolls on paper towels, which trap steam against the bottom surface and cause the wrapper to soften. Let the eggrolls rest on the rack for 2-3 minutes before serving, allowing excess oil to drain completely.
⏱ Time: 2-3 minutes
✓ Doneness: Oil has stopped dripping from the eggrolls, exterior surface feels dry and crisp
Step 21
Allow the oil to recover to 350°F before frying the next batch. Check the thermometer—it typically takes 30-60 seconds for the oil to return to temperature after the previous batch. While waiting, check that all eggrolls from the first batch have finished draining. Repeat steps 18-20 with remaining eggrolls.
⏱ Time: 30-60 seconds between batches
✓ Doneness: Thermometer reads 350°F (175°C) again, oil stops actively bubbling from the previous batch
Step 22
Once all eggrolls are fried and have drained completely (5-10 minutes total cooling time), they are ready to serve. Serve immediately with your choice of dipping sauce—avocado ranch, chipotle mayo, or a simple combination of sour cream, lime juice, and a pinch of cumin work wonderfully. Eggrolls are best consumed within 1-2 hours of frying, while the wrapper is still crispy. After 2 hours at room temperature, moisture begins migrating from the filling into the wrapper regardless of initial drying, softening the texture.
⏱ Time: 0 minutes (serving)
✓ Doneness: Eggrolls are cooled enough to handle, exterior is completely dry and crispy
Pro Tips
Dry your beans and corn with obsessive thoroughness. Spread them on separate paper towels and let them sit for 5 minutes after patting dry. This single step is responsible for more texture improvement than any other factor.
Residual surface moisture is the primary cause of oil absorption and soggy wrappers. Paper towels continue to wick moisture even after you stop actively patting. Water and oil are mutually exclusive—the more water you remove, the less oil the wrapper can absorb. Beans dried this way result in crispy eggrolls that stay crisp for 3+ hours, while undried beans result in softening within 45 minutes.
Shred cheese from a block using a box grater or microplane rather than buying pre-shredded cheese. This changes the final texture noticeably.
Pre-shredded bagged cheese contains cellulose (anti-caking agent) that prevents smooth melting. The cellulose creates a grainy, separated texture in the filling where you can see stringiness and granules. Block cheese shredded fresh melts smoothly and evenly, creating a cohesive, creamy component of the filling.
Keep the filling cool (refrigerated) until the moment you wrap it. Warm filling causes the cheese to soften and release fat before frying even begins, creating greasiness.
Cheese has a melting point around 90°F (32°C). If your filling is at room temperature or warmer, the cheese is already beginning to soften. This released fat migrates into the wrapper before any frying occurs, making the wrapper greasy from the inside out. Cool filling keeps the cheese solid and stable through the entire wrapping process.
Use a thermometer to monitor oil temperature, not visual cues or intuition. The difference between 340°F and 360°F dramatically affects the final texture but is invisible to the naked eye.
At 340°F, the oil is too cool to seal the wrapper quickly, allowing oil gradual infiltration. At 360°F, the exterior browns too fast while the filling remains cold. At exactly 350°F, the seal forms in the critical first few seconds while the interior heats evenly. A thermometer costs $10 and removes all variables from this crucial step.
Fry no more than 4 eggrolls at a time in a standard pot. Crowding the pot is the second-most-common mistake after moisture issues.
Each eggroll at room temperature absorbs about 150-200 calories of heat from the oil when added. Four eggrolls drop the oil temperature about 10-15°F if fully recovered between batches. If you add more than four, the temperature plummets below 330°F, and the oil is too cool to form the protective seal. The eggrolls will absorb oil and end up greasy rather than crisp.
Let eggrolls drain on a wire rack set over a pan, not on paper towels. The rack allows air circulation on all surfaces.
Paper towels trap steam against the bottom of the eggroll, where condensation forms and softens the wrapper from below. A wire rack allows steam to dissipate freely while excess oil drains away. This is why restaurant-quality fried foods always cool on wire racks—it's not an aesthetic choice, it's functional.
Seal the top corner with water and firm pressure. A properly sealed eggroll will not burst open during frying.
If the seal is weak, the eggroll can open as it fries, allowing filling to escape into the oil. This creates both a mess and a ruined eggroll. The seal should be tight enough that you cannot pull the corner open with moderate pulling pressure. If the seal is weak, it means you didn't use enough water or press firmly enough.
Common Mistakes to Avoid
Attempting to fry eggrolls without drying the beans and corn first, or drying them insufficiently
Why it happens The drying step seems tedious and unnecessary. Rinsing the beans feels like it's enough. However, canned beans retain significant moisture even after rinsing, and people don't account for the osmotic effect where ingredients continue releasing moisture into the filling mixture over time.
Fix Commit to the full drying protocol: rinse, drain for 2 minutes, spread on paper towels, pat gently, then let sit for 5 minutes. You'll notice the paper towel becomes noticeably damp—this is water that would have otherwise ended up in your eggroll wrapper. This single step results in crispy eggrolls versus soft eggrolls.
Using oil temperature that is too low (below 340°F) or too high (above 360°F)
Why it happens Many home cooks don't have a thermometer or trust their intuition that 'hot oil' is sufficient. The difference between 340°F and 360°F is invisible and feels the same, but has enormous texture implications.
Fix Invest in a thermometer—a basic deep-fry thermometer costs $8-12. Check the temperature before frying the first eggroll and between batches. At 350°F, you get perfect crispy wrappers. Any other temperature gives inferior results. The thermometer pays for itself in improved results on the first batch.
Crowding the pot with too many eggrolls at once (more than 4)
Why it happens Frying in smaller batches feels inefficient and adds 5-10 minutes to the total time. The temptation to speed up the process by frying more eggrolls simultaneously is strong.
Fix Fry in batches of 3-4 maximum. Allow 30-60 seconds for the oil to recover to 350°F between batches. The total frying time for 12 eggrolls is about 12-15 minutes (three batches of 4 eggrolls, about 3 minutes per batch plus recovery time). This is worth the investment for consistently crispy results.
Dragging or flipping eggrolls before the first side has set (before 90 seconds)
Why it happens When eggrolls first enter the oil, they float but seem vulnerable. The instinct is to check them quickly or flip them to ensure even cooking. However, they need time to form a protective crust.
Fix Do not disturb eggrolls for the first 90 seconds. Resist the urge to flip or move them. The oil temperature is right, and 90 seconds is how long it takes for the crust to set. After 90 seconds, flip gently and continue cooking without further disturbance until golden.
Using warm filling for wrapping, or wrapping the filling immediately after combining ingredients
Why it happens When filling is warm, the cheese is soft and easy to work with. It feels like it would be easier to wrap warm filling. Additionally, people want to fry immediately and don't want to wait for cooling.
Fix Refrigerate the combined filling for at least 10-15 minutes before wrapping. This cools the mixture and allows the cheese to re-solidify. Cool filling is easier to wrap because the cheese is firm and won't create slippery, greasy surfaces. The 15 minutes of waiting results in much better final texture.
Overfilling the wrappers beyond 2 heaping tablespoons
Why it happens More filling seems like it would create better eggrolls. People intuitively add extra filling wanting fuller, more substantial eggrolls.
Fix Stick to 2 heaping tablespoons per wrapper. This is the maximum amount that can be sealed properly and fried evenly. Overfilled eggrolls tear at the seams during frying, burst open, and release filling into the oil. The 2-tablespoon standard is based on the wrapper size and how much filling can be completely surrounded by dough.
Draining fried eggrolls on paper towels instead of a wire rack
Why it happens Paper towels are the standard for draining most fried foods, so people assume they work for eggrolls too. Additionally, wire racks are not as common in home kitchens as paper towels.
Fix Use a wire rack positioned over a sheet pan. A basic wire cooling rack costs $5-10 and is reusable for countless posts. Paper towels trap steam against the eggroll, where it condenses and softens the wrapper. A wire rack allows steam to escape and air to circulate, keeping the wrapper crisp much longer.
Variations
Baked Southwest Eggrolls
Preheat oven to 400°F (200°C). Arrange wrapped eggrolls on a wire rack positioned over a sheet pan. Lightly spray the top and all sides with cooking oil using an oil spray bottle. Bake for 18-22 minutes, rotating the pan halfway through and flipping the eggrolls over at the 10-minute mark. The eggrolls will turn golden brown and crisp. The texture differs from fried versions—more crackly and less shatteringly crisp—but still very satisfying with approximately 60% less fat per serving than fried.
Note: Baking at 400°F causes the wrapper to crisp through rapid moisture evaporation rather than oil-based crisping. The texture is crackly because the dough has very little fat content during baking (only the light spray), whereas fried eggrolls have oil throughout the wrapper matrix, creating the shatter effect. Both methods produce edible, delicious eggrolls; the choice depends on whether you prioritize texture or fat content.
Vegetarian Black Bean and Cheese Eggrolls
Replace the chicken with an additional 1/2 cup (85g) of black beans (total of 1 cup beans instead of 1/2 cup), and add 1/4 cup (45g) of cooked quinoa or brown rice to replace the chicken's protein contribution. Add 2 tablespoons of cream cheese to help bind the filling and replace the fat content normally provided by chicken. Increase the cumin to 3/4 teaspoon for deeper flavor complexity. Proceed with assembly and frying exactly as directed. The filling will have a slightly softer, more cohesive texture than the chicken version due to the starch addition.
Note: Vegetarian fillings require added binding agents because beans alone create a looser filling. Quinoa or rice provides structure and starch; cream cheese provides fat and helps bind. This combination creates a cohesive filling that holds together during frying without falling apart.
Spicy Jalapeño Southwest Eggrolls
Add 1 minced jalapeño (seeds and white membrane removed for medium heat, or included for more intense heat) and 1/4 teaspoon (0.5g) of cayenne pepper to the filling. Proceed with assembly and frying exactly as directed. The heat from the jalapeño and cayenne builds as the eggrolls cool slightly, peaking after a few minutes. These are noticeably spicier but not aggressively so if seeds are removed.
Note: Fresh jalapeño releases moisture into the filling. To compensate, add an extra 1 minute to the paper towel drying time before wrapping. Cayenne dissolves instantly into the filling and distributes heat evenly. The flavor is more sophisticated than simple heat—the cayenne adds depth in addition to spice.
Air Fryer Southwest Eggrolls
Wrap eggrolls exactly as directed. Place in a single layer in the air fryer basket without overlapping. Spray lightly with cooking oil on all sides using an oil spray bottle. Set air fryer to 375°F (190°C) and cook for 8-10 minutes, shaking the basket or flipping eggrolls at the 5-minute mark. They will turn golden brown and crisp. The texture falls between baked and fried—crispier than baked but less shattering than deep-fried.
Note: Air fryers work through concentrated heat and air circulation, similar to convection ovens but at higher velocity. The result is faster cooking than a conventional oven and crisper texture due to the vigorous air movement. However, they don't achieve the complete oil-saturation that creates the true shatter-crisp of deep frying.
Gluten-Free Rice Paper Southwest Eggrolls
Substitute eggroll wrappers with rice paper wrappers (also called rice flour wrappers, found in the Asian section). Rice paper is completely gluten-free and creates a different texture—more delicate and crackly. To use rice paper: briefly dip each wrapper in warm water for 10-15 seconds until pliable, lay on a clean damp surface, fill exactly as directed with eggroll wrappers, and roll tightly. These are best pan-fried rather than deep-fried: heat 1/4 inch (0.6cm) of oil in a large skillet over medium-high heat to 350°F and cook eggrolls 2-3 minutes per side, turning carefully.
Note: Rice paper has a completely different dough structure than wheat-based wrappers. It's thinner and becomes translucent when wet. Rice paper eggrolls are more fragile and crack more easily during frying, but they cook faster and have less gluten-related digestive effects for sensitive individuals. Pan-frying is preferable because rice paper is delicate and can tear in the vigorous environment of deep frying.
Nutrition
Per Serving:
185 (fried) / 155 (baked)
Calories
10g (fried) / 6g (baked)
Fat G
3.5g (fried) / 2.5g (baked)
Saturated Fat G
These values are estimates based on USDA nutrition data and specific ingredient brands used in testing. Actual values vary depending on exact oil absorption during frying, specific cheese saltiness, and exact portion sizes. Values provided for fried eggrolls in oil as described; baked versions contain approximately 30% less total fat and 70 fewer calories per eggroll. Canned black beans and store-bought rotisserie chicken brands affect final sodium content.
Storage & Tips
Refrigerator
Store completely cooled fried eggrolls in an airtight container with paper towels layered between eggrolls to absorb residual moisture and condensation. Store up to 3 days. The wrapper texture softens gradually over time as moisture migrates from the filling into the wrapper, even in airtight containers. This is unavoidable but occurs more slowly in airtight containers than in open air. Eggrolls on day 1 are noticeably crispier than on day 3.
Freezer
Freeze assembled but uncooked eggrolls for up to 3 months. Lay them on a parchment-lined baking sheet and freeze solid (about 2 hours), then transfer to a freezer bag or airtight container. Do not thaw before frying—fry directly from frozen, adding 1-2 minutes to the cooking time. Frozen eggrolls produce excellent results because the filling stays at an ideal temperature during the initial searing phase. Frozen eggrolls actually produce crispier wrappers than room-temperature eggrolls because the cold filling cools the oil less upon contact, allowing faster wrapper setting.
Make Ahead
The optimal make-ahead approach is to prepare and refrigerate the filling up to 24 hours in advance. When ready to wrap and fry, bring the filling to room temperature for 5 minutes (so it's not cold and stiff), then assemble and fry immediately. This saves the most time on day-of while preserving maximum texture. Alternatively, assemble eggrolls up to 4 hours before frying and keep them on a sheet pan at room temperature, covered loosely with plastic wrap so they don't dry out. Do not refrigerate assembled but uncooked eggrolls for more than 4 hours—the wrappers begin absorbing moisture from the filling.
FAQ
Can I make southwest eggrolls ahead of time and freeze them?
Yes, freezing assembled but uncooked eggrolls works excellently. Lay them on a parchment-lined baking sheet, freeze solid for about 2 hours, then transfer to a freezer bag or airtight container. Store up to 3 months. Fry directly from frozen without thawing, adding 1-2 minutes to the cooking time. Interestingly, frozen eggrolls produce crispier wrappers than room-temperature eggrolls because the cold filling keeps the oil closer to 350°F during the initial searing phase.
Why are my southwest eggrolls soggy and soft instead of crispy?
Soggy eggrolls result from two primary causes: (1) moisture in the filling wasn't properly removed, or (2) oil temperature was too low. If the beans and corn weren't thoroughly dried, moisture migrates into the wrapper. If the oil was below 340°F, it wasn't hot enough to seal the wrapper quickly, allowing oil absorption instead of crisping. Verify both factors: dry ingredients obsessively and check oil temperature with a thermometer at 350°F before frying.
Can I use wonton wrappers instead of eggroll wrappers?
Technically yes, but the results differ substantially. Wonton wrappers are about half the thickness and half the size of eggroll wrappers. You'll need to reduce filling to 1 tablespoon per wrapper, and they'll fry in about 2-2.5 minutes instead of 3-4 minutes. The result is bite-sized wontons rather than substantial eggrolls. If you only have wonton wrappers, this works, but the texture and experience is different from traditional eggrolls.
How long do cooked southwest eggrolls stay crispy at room temperature?
Eggrolls are best served within 1-2 hours of frying while the wrapper is at maximum crispness. After 2 hours at room temperature, moisture from the filling begins migrating into the wrapper, softening the texture. This happens regardless of how well you dried the ingredients initially—it's an unavoidable aspect of the filling having higher moisture content than the wrapper. After 3-4 hours, the wrapper is noticeably softer.
What dipping sauce goes best with southwest eggrolls?
The filling's cumin and chili powder pair well with cooling, creamy sauces. Avocado ranch (ranch sauce mixed with mashed avocado), chipotle mayo (mayonnaise blended with chipotle peppers and lime), or cilantro-lime crema (sour cream, lime juice, cilantro, and garlic) all work excellently. For simplicity, mix sour cream with fresh lime juice and a pinch of cumin—this takes 2 minutes and complements the southwest flavors perfectly.
Can I bake southwest eggrolls instead of frying?
Yes, baking works well as a lower-fat alternative. Preheat oven to 400°F (200°C), arrange eggrolls on a wire rack over a sheet pan, spray lightly with cooking oil on all sides, and bake 18-22 minutes, rotating the pan and flipping eggrolls halfway through. The texture is crackly and crisp but not quite as shattering as fried versions. Baked eggrolls contain approximately 60% less fat per serving than fried eggrolls.
Do I need to seal the eggroll wrapper with water, or can I use an egg wash or something else?
Water works best for sealing eggroll wrappers. Egg wash (beaten egg) creates a darker seam that's visible in the finished eggroll and can taste slightly eggy. Corn starch slurry (cornstarch mixed with water) can work but is less reliable for adhesion. Plain water is simplest, most reliable, and creates an invisible seal that won't affect flavor.
Can I use shredded rotisserie chicken from the grocery store, or does it need to be homemade?
Store-bought rotisserie chicken is perfect for this recipe. It's already cooked, properly seasoned, and shredding takes only a minute. If you prefer homemade, poached chicken or any roasted chicken works equally well. The key is that the chicken is completely cooked and shredded into small, uniform pieces before combining with other filling ingredients.
Why does my filling seem loose or wet even after I dried the ingredients?
Over time, the filling continues releasing moisture as ingredients sit together. This is especially true if the filling sits at room temperature for more than 20-30 minutes. If you notice excessive moisture pooling, spread the mixture on a paper towel and let it sit for 5-10 minutes to absorb the released moisture. Additionally, sharp cheddar can release some liquid as it warms—keeping the filling refrigerated until the moment you wrap it helps prevent this.
Can I reuse the oil from frying eggrolls for other cooking?
You can reuse the oil once or twice for frying, but not for other cooking methods. After frying, strain the oil through cheesecloth or a fine-mesh strainer to remove any particles or breading. Store in an airtight container. Use the oil only for frying other foods with similar flavors (eggrolls, other Asian appetizers, etc.). Do not use for baking or salad dressings, as the oil has absorbed flavors and broken down slightly. After 2-3 uses, discard the oil and start fresh.
Final Thoughts
<p>Southwest eggrolls taught me more about the mechanics of deep frying than any other dish I've made. The obsession with moisture control, oil temperature precision, and technique details feels excessive until you realize these details are the difference between crispy eggrolls and soft, greasy eggrolls. Once you understand why each step matters—why beans must be dried completely, why 350°F is the exact right temperature, why wire racks allow better cooling than paper towels—you can apply these principles to other fried foods with confidence.</p><p>The filling itself is flexible. Experiment with different spices, vegetables, and proteins. The principles remain the same: dry your wet ingredients thoroughly, maintain proper oil temperature, fry in small batches, and cool on a wire rack. Master these fundamentals, and you'll produce restaurant-quality fried appetizers in your home kitchen.</p><p>If you've tried this recipe, I'd love to hear how it turned out and what variations you tested. Leave a comment below with your results, questions, or any adjustments that worked particularly well for you.</p>